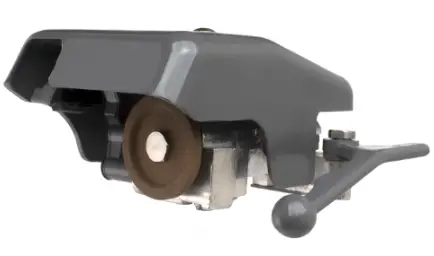
Push the Lock Lever to the left to remove the Hobart slicer sharpener. Then, tilt the right side of the sharpener upward to clear the guide pin. Lift the sharpener, making sure to clear the left guide pin as well. Once removed, clean the sharpener by wiping out any residue inside the housing and washing it in a sink with warm soapy water. Rinse it thoroughly with fresh water before drying it completely. Now you can reassemble the slicer. Remember to always prioritize safety by unplugging the slicer before performing any maintenance tasks.
How to Remove the Hobart Slicer Sharpener: Step-by-Step Guide
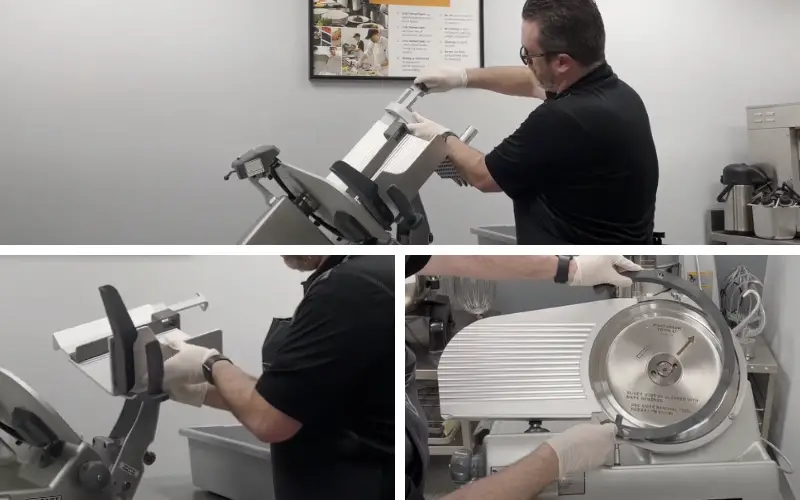
As part of their maintenance routine, you may need to remove the sharpener for cleaning or replacement. Here is a step-by-step guide on how to remove the Hobart slicer sharpener, ensuring that you can keep your slicer in optimal condition.
Prepare for Removal
Unplug the Slicer: Always prioritize safety by unplugging the slicer from the power source before starting the removal process.
Removing the Sharpener
Push the Lock Lever: Locate the Lock Lever on the slicer and push it to the left to unlock the sharpener.
Tilt the Right Side: Tilt the right side of the sharpener upward, ensuring it clears the right guide pin.
Lift the Sharpener: Once the right side is tilted, lift the sharpener, making sure to clear the left guide pin as well.
Cleaning the Sharpener
Wipe out Residue: After removing the sharpener, use a clean cloth to wipe out any residue remaining inside the sharpener housing.
Clean with Soapy Water: Take the sharpener to a sink and clean it using warm soapy water. Ensure that all surfaces are thoroughly cleaned.
Rinse with Fresh Water: Rinse the sharpener with fresh water to remove any soap residue. This will ensure that no residue remains on the sharpener.
Dry the Sharpener: After cleaning, dry the sharpener completely before reassembling it. This will prevent any moisture from causing damage or rust.
How to Sharpen the Blade on a Hobart Slicer?
Prepare for Sharpening
Unplug the Slicer: Before starting the sharpening process, ensure that the slicer is unplugged from the power source for safety reasons.
Sharpening the Blade
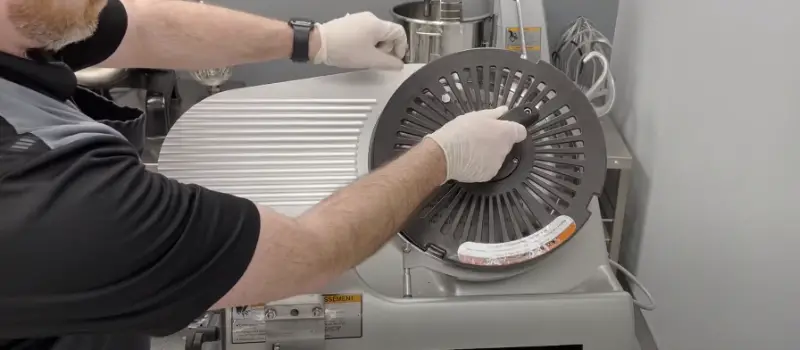
Close the Gauge Plate: Turn the index knob fully clockwise to close the gauge plate. This ensures the knife edge is protected during the sharpening process.
Remove the Top Knife Cover: Rotate the Latch Knob counterclockwise and lift off the Top Knife Cover from the slicer.
Clean the Knife Area: Thoroughly wash the area around the knife, the exposed knife surfaces, and the knife edge. Ensure that no fat from meat or cheese transfers from the knife to the sharpener.
Plug in the Slicer: Connect the machine’s power cord to a suitable power source.
Start the Slicer: With the carriage, tray pulled fully forward, pull the start switch forward and hold it out to start the slicer.
Sharpen the Blade: If the sharpener handle hangs downwards, lift it with your left hand until it is horizontal. Pull the sharpener handle forward for 5 seconds.
Release the Sharpener Handle: Slowly release the sharpener handle after sharpening.
Turn off the Slicer: Release the switch knob to turn off the slicer.
Repeat if Necessary: If the blade requires further sharpening, repeat the sharpening process for another 5 seconds.
- Unplug the Slicer: After completing the sharpening process, unplug the machine’s power cord for safety.
- Clean the Slicer: Wipe the slicer with a clean damp cloth to remove any grinding particles.
- Replace the Top Knife Cover: Put the Top Knife Cover back in place by aligning it correctly and rotating the Latch Knob clockwise until secure.
Safety Tips for Using a Hobart Slicer:
Positioning of Safety Devices:
- Ensure that all safety devices incorporated in the slicer are in their correct operating positions while the slicer is in use.
- The TOP KNIFE COVER must be securely positioned with the LATCH KNOB to prevent any unauthorized access to the blade.
- The RING GUARD, though not removable, acts as an additional protective barrier around the blade area.
- The DEFLECTOR, located below the slicer knife, can be removed for cleaning purposes. However, make sure to reinstall it securely before using the slicer.
Using the Meat Grip:
- The MEAT GRIP, an essential safety feature, must be utilized when slicing short ends of meat. It keeps your hand(s) at a safe distance from the knife, minimizing the risk of injury.
Turning off the Slicer:
- When the slicer is not in operation, turn the INDEX KNOB back below zero (fully clockwise) to cover the knife edge with the GAUGE PLATE. This ensures that the sharp edge of the blade is safely concealed.
Unplugging the Slicer:
- Always remember to UNPLUG the POWER CORD before cleaning or moving the slicer. This prevents accidental activation of the slicer and ensures operator safety.
Frequently Asked Questions:
How often should I sharpen the blade on my Hobart slicer?
Sharpen the blade only when necessary to avoid unnecessary wear. High-volume applications may require more frequent sharpening.
Can I remove the sharpener for cleaning?
Yes, the sharpener can be removed to clean it properly. Follow the steps provided in this article for safe removal.
Is it safe to clean the sharpener with water?
Yes, you can clean the sharpener with warm soapy water. Make sure to rinse it thoroughly with fresh water and dry it before reassembling it.
How long does the Hobart slicer blade last?
The Hobart cast stainless steel knife is designed for long service. However, frequent or daily sharpening in high-volume applications may result in a shorter lifespan.
Conclusion:
Knowing how to properly remove the Hobart slicer sharpener is essential for maintaining and cleaning your slicer. By following the step-by-step instructions provided, you can safely and effectively remove the sharpener, clean it, and ensure the longevity of your slicer. Remember to prioritize safety by unplugging the slicer before performing any maintenance tasks. With regular maintenance and care, your Hobart slicer will continue to deliver exceptional performance and precision slicing for your culinary needs.
Key Points:
- Hobart slicers are designed for heavy-duty usage and feature durable blades.
- The sharpener can be removed for cleaning by following specific steps.
- Blade sharpening should only be done when necessary to avoid excessive wear.
- Safety guidelines, such as proper device positioning and unplugging the slicer, should always be followed.
- Maintain your Hobart slicer for long-lasting performance and optimal results.
References And Citations:
Here are some suggested external links for the above article with corresponding anchor text:
- Hobart Slicers: https://www.hobart.ca/food-preparation/slicers/ Hobart Slicers
- Deli Bags with Product Labels: Deli Bags with Product Labels.https://www.interplas.com/deli-bags
- Disposable Latex Gloves: https://pksafety.com/disposable-safety-gloves Disposable Latex Gloves.
- Hobart Slicer Maintenance Guidehttps://www.culinarydepotinc.com/hobart-edge12-11-12-centerline-manual-slicer/ : Hobart Slicer Maintenance Guide.
- Hobart Slicer Safety Features: Hobart Slicer Safety Features https://www.partstown.com/cm/resource-center/guides/gd2/how-to-clean-a-hobart-meat-slicer

John Hebdon is a food enthusiast, passionate chef, and author of various articles and blog posts related to food and cooking. With a deep love for all things culinary, John’s blog serves as a platform to share his extensive kitchen experiences with a broader audience.
In addition to his culinary expertise, John has a flair for writing and a natural ability to share his passion for food with others. His articles and blog posts are informative, engaging, and packed with practical tips for readers of all skill levels.
As a food enthusiast and writer, John is always on the lookout for new and exciting culinary experiences. Whether it’s trying out a new restaurant, experimenting with a new recipe, or simply sharing a favorite dish with friends and family, John is always eager to explore and share the world of food with others.

