Hobart is a well-known manufacturer of high-quality commercial kitchen equipment, including their line of food slicers. Two models that are often compared are the Hobart 2912B and 2912 slicers. Both models are designed to deliver efficient, precise slicing and are constructed for durability, making them a preferred choice in many commercial kitchens. However, discerning the specific differences between these two models can be a challenge without precise and up-to-date specifications from the manufacturer.
Hobart Slicer 2912
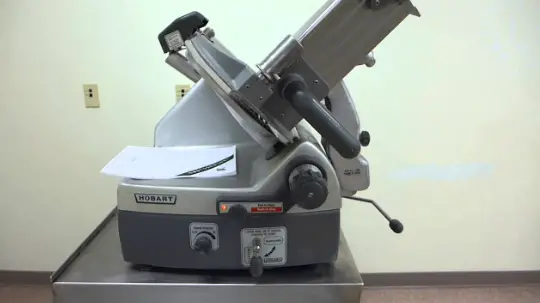
The Hobart Slicer 2912 is a reliable machine that can be used manually or automatically, making it a flexible option for diverse culinary demands. Whether you’re slicing ham or cheese, this slicer ensures a seamless experience.
Key Features Of Hobart 2912
- Smooth and easy operation: Offers a straightforward “Start” and “Stop” function, making it user-friendly.
- Adjustable thickness: The slicer gives you control over the thickness of your slices, adding versatility to your culinary creations.
- Different speeds: The slicer runs at multiple speeds, providing efficiency and precision based on your needs.
How To Use Hobart Slicer 2912?
Here is a step-by-step explanation of the procedure described:
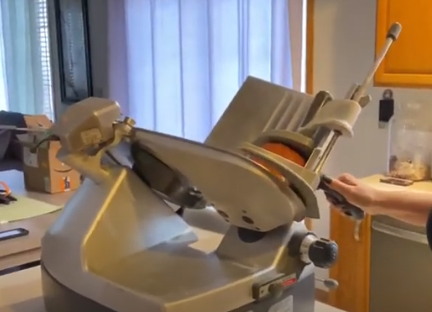
Step1: Place the Food on the Meat Carriage: This is the platform where the item to be sliced (in this case, ham) is placed. It’s designed to hold the item securely and feed it into the blade.
Step2: Start the Machine: This is done by pressing the ‘Start’ button on the machine.
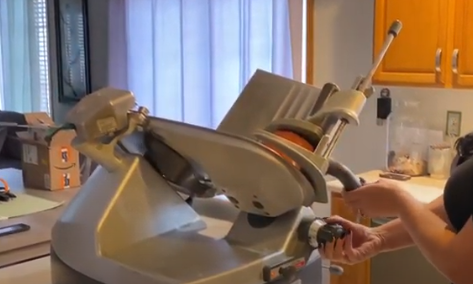
Step 3: Adjust the Thickness: The machine has a dial that allows you to adjust the thickness of the slices. You can customize this setting depending on whether you want your ham to be sliced thin or thick.

Step 4: Start Slicing in Manual Mode: In manual mode, you control the movement of the carriage. As you move the carriage, the ham is pressed against the rotating blade and sliced.
Step 5: Switch to Automatic Mode: In automatic mode, the machine moves the carriage back and forth automatically, creating consistent slices without needing manual intervention.

Step 6: Adjust the Speed: The Hobart 2912 slicer allows you to control the speed of slicing, which can be beneficial for different types of food or for personal preference.
Step 7: Stop the Machine: After the slicing is done, you press the ‘Stop’ button to halt the machine’s operation.
Hobart Slicer 2912B
Key Features Of Hobart 2912B
- Convenient: Designed for easy, dependable manual or automatic slicing.
- Instructional support: Comes with an instructional video for operational clarity.
- Complete cleaning required: Ensure the slicer is thoroughly cleaned before the first use for optimal performance.
- Adjustable slice thickness and speed: Similar to the Hobart 2912, it offers control over slice thickness and different speed settings.
How To Use Hobart Slicer 2912B?
Step 1: Preparation: Ensure the top knife cover is in position and secure with the latch knob. Place the slicer on a solid, non-moving surface. If you’re setting up a new slicer, confirm the electrical specifications align with your power supply.
Step 2: Installation: Install the carriage tray support arm assembly by fitting the support arm key into the carriage pivot slot. Position the carriage for operation and secure it by tightening the knob clockwise. Ensure the sharpener is mounted on top of the slicer and the top knife cover and deflector are in place.
Step 3: First-time Use and Cleaning: Before using the slicer for the first time, it needs to be thoroughly cleaned. This may involve some disassembly and reassembly.
Manual Slicing:
- Start by setting the lever to manual mode and turning the index knob fully clockwise to close the gauge plate.
- Pull the carriage tray toward you and place your product on it.
- If needed, adjust the fence and slide it so it’s close to the product but not pushing against it. Tighten the thumbscrew and rotate the meat grip into position. If the meat grip is not needed, store it under the carriage tray.
- Adjust the slice thickness with the index knob and open the gauge plate by setting the slice thickness.
- Turn the slicer on by pulling the switch knob and release it once it starts. You can use either of the carriage trays handles for manual slicing.
- You can turn the slicer off by pushing the switch knob or by turning the index knob clockwise to close the gauge plate.
Automatic Slicing:
- To switch to automatic mode, pull the carriage to the home position, move the lever to the automatic position, adjust the gauge plate to the desired slice thickness, and set the carriage speed.
- Start automatic slicing by pulling the switch knob.
- To pause the slicer, pull the switch knob. Resume slicing by pulling the switch knob again.
Step 4: Maximizing Yield: When there’s about an inch of roast left, pause the slicer, move the meat grip to the retaining clip, and place the remaining roast piece to the side. Add the new roast and replace the meat grip, adjusting the fence if necessary. Resume slicing.
Difference Between Hobart Slicer 2912 And 2912B
Sure, here are the key differences between the Hobart slicer 2912 and 2912B:
Accessories:
Hobart 2912: This model comes equipped with a new meat grip, meat fence, product deflector, and the original sharpener, making it versatile for a wide range of slicing needs.
Hobart 2912B: This model, on the other hand, emphasizes operational comfort and efficiency. It doesn’t necessarily come with the additional accessories that the 2912 model does.
Instructional Support:
Hobart 2912: The instruction manual that comes with this model provides necessary information about its operation.
Hobart 2912B: The 2912B stands out with its instructional video support, making it easier for new users to understand the operational procedures.
Knife: The 2912B model features an exclusive Hobart Clean Cut™ contoured stainless steel knife with a super alloy edge, which is not mentioned for the 2912 model.
Meat Grip: The 2912B comes with a heavy front-mounted meat grip as standard equipment, while the type of meat grip on the 2912 model isn’t specified.
Motor and Electrical Service: The 2912B model has a 1/2 HP motor and is available for single-phase electrical service. The motor and service availability for the 2912 model isn’t specified.
Cord and Plug: The 2912B model comes with a cord and plug as standard equipment, while this feature is not mentioned for the 2912 model.
Ease of Use: Both models offer a reliable and efficient slicing solution. However, the 2912B, with its instructional video support, is designed to be more user-friendly, particularly for those new to using slicers.
Versatility: Both slicers offer manual and automatic operations and adjustable slice thickness. However, the 2912 with its additional accessories has a slight edge in terms of versatility.
FAQs
How do I clean my Hobart slicer?
Always unplug the slicer before cleaning. Remove removable parts for thorough cleaning and sanitize them according to local health department guidelines. The slicer’s body can be wiped down with a damp cloth and mild detergent, but do not use a hose or immerse the slicer in water.
Can I slice cheese with my Hobart slicer?
Yes, you can slice cheese using a Hobart slicer. However, it’s recommended to use a slicer specifically designed for cheese, especially for large volumes, to maintain efficiency and prolong the life of the machine.
How often should I sharpen the blade on my Hobart slicer?
The frequency of blade sharpening depends on usage. Under normal conditions, Hobart recommends sharpening the blade every two weeks. However, if the slicer is used heavily, you may need to sharpen the blade more often.
Can I use my Hobart slicer for both raw and cooked foods?
Yes, but remember cross-contamination could occur if proper cleaning procedures are not followed between slicing different types of food. It’s important to thoroughly clean the slicer when switching between raw and cooked foods.
What should I do if my Hobart slicer isn’t working correctly?
If you’re experiencing issues with your Hobart slicer, refer to the troubleshooting guide in your user manual. If you’re unable to resolve the issue, contact Hobart Service for professional assistance.
Conclusion
The Hobart 2912 and 2912B are both exceptional slicers that make a valuable addition to any kitchen. The choice between the two ultimately boils down to individual needs and preferences. No matter which you choose, these slicers promise to deliver consistency, precision, and ease, making your kitchen operations a slice of heaven.
Key Points
Whether it’s the Hobart 2912 or the 2912B, both models offer a reliable and efficient slicing solution. They bring versatility and precision to your kitchen, elevating your culinary skills. Here are the key takeaways:
- Both slicers offer manual and automatic operations, providing versatility.
- They come with adjustable slice thickness and speed controls, allowing for personalized usage.
- The Hobart 2912 includes additional accessories, enhancing its slicing capabilities.
- The Hobart 2912B has instructional support, making it user-friendly for beginners.

John Hebdon is a food enthusiast, passionate chef, and author of various articles and blog posts related to food and cooking. With a deep love for all things culinary, John’s blog serves as a platform to share his extensive kitchen experiences with a broader audience.
In addition to his culinary expertise, John has a flair for writing and a natural ability to share his passion for food with others. His articles and blog posts are informative, engaging, and packed with practical tips for readers of all skill levels.
As a food enthusiast and writer, John is always on the lookout for new and exciting culinary experiences. Whether it’s trying out a new restaurant, experimenting with a new recipe, or simply sharing a favorite dish with friends and family, John is always eager to explore and share the world of food with others.


