To use the Simple Slicer, remove the food holder and slider, choose your desired thickness, align the slider with the board track, and start slicing by moving the slider over the blade. After use, disassemble the food holder for cleaning, clean the blade with a brush, and reassemble it for storage. Always follow safety instructions and precautions to handle the sharp blade properly. With its user-friendly design and dishwasher-safe feature, the Pampered Chef Simple Slicer is a must-have tool for any kitchen.
Understanding the Pampered Chef Simple Slicer
Features and Benefits
The Pampered Chef Simple Slicer is a versatile kitchen tool that offers various features and benefits, making it an essential tool for any kitchen:
Adjustable Blade
- The slicer comes with a blade that can be adjusted to three different thickness settings – 1/16″ (2 mm), 1/8″ (3 mm), and 3/16″ (5 mm).
- This adjustable feature allows you to achieve the perfect thickness for your slicing needs, whether it’s for delicate shaved slices or thicker cuts.
Food Holder
- The Simple Slicer includes a food holder that ensures your hands stay safe and away from the sharp blade.
- The food holder also provides a secure grip on the product you’re slicing, preventing any accidental slips and injuries.
Safety Lock
- With its safety lock feature, the Simple Slicer raises the body of the slicer when not in use, ensuring safe storage.
- This safety lock helps to prevent any accidental injuries that may occur when the slicer is not in active use.
Nonskid Feet
- The nonskid feet of the Simple Slicer keep the slicer firmly in place during use.
- These nonskid feet provide stability, reducing the risk of accidents and ensuring safe and precise slicing.
Dishwasher-Safe
- Cleaning up after slicing tasks is a breeze with the Simple Slicer, as it is dishwasher-safe.
- Simply place the slicer in the dishwasher for convenient and easy cleaning, saving you time and effort.
How to Use the Pampered Chef Simple Slicer?
Removing the Food Holder and Slider
To prepare the Pampered Chef Simple Slicer for use, follow these steps:
Unlock the Blade
- Move the button on the slicer to the desired thickness setting.
- This action will unlock the blade, allowing you to adjust it for your slicing needs.
Slide off the Food Holder and Slider
- Be cautious as the blade is now exposed and in the slicing position.
- Slide the food holder and slider off the board, ensuring you have a clear workspace for slicing.
Choosing the Desired Thickness
The Pampered Chef Simple Slicer offers three different thickness settings, each corresponding to a specific number on the blade:
Setting 1: Produces a Shaved Slice
- This setting creates slices approximately 1/16″ (1-2 mm) thick.
- Ideal for thinly slicing potatoes, fennel, radishes, and other delicate produce.
Setting 2: Medium Thickness
- This setting produces slices approximately 1/8″ (3-mm) thick.
- Perfect for potatoes, onions, zucchini, and other vegetables requiring a slightly thicker cut.
Setting 3: Thick Slices
- This setting creates slices approximately 3/16″ (5.6-mm) thick.
- Great for thick slices of tomatoes, lemons, cucumbers, and other products where a substantial thickness is desired.
Aligning the Slider with the Board Track
To ensure smooth slicing with the Pampered Chef Simple Slicer, it’s important to align the slider with the board track.
Align the Tracks
- Position the slider’s tracks so that they align with the board track.
- This ensures that the slider moves smoothly during slicing.
Lock the Slider into Place
- Push the slider towards the handle until it locks into place.
- This secures the slider in position, allowing for stable and controlled slicing.
Slicing Techniques and Tips
Now that you have set up the Pampered Chef Simple Slicer, it’s time to start slicing like a pro. Follow these guidelines for optimal slicing results:
Prepare the Food
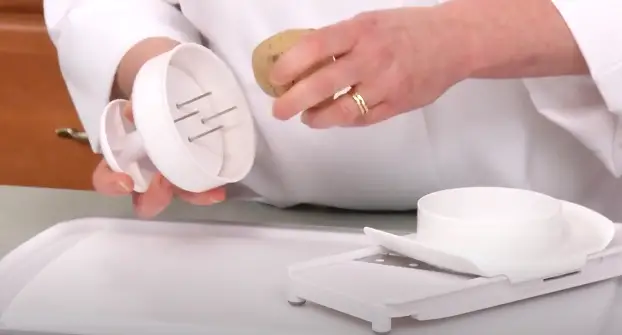
- Lift the food holder from the slider and push the food into the prongs.
- Ensure that the food holder and slider are used together during slicing.
Choose Your Preferred Position
- Decide how you want to hold the Simple Slicer during slicing:
- Hold it by the handle for precision and control.
- Rest the nonskid feet on a flat surface at an angle for stability.
- Align the grooves with the top of a bowl for an easy collection of sliced produce.
Slice with Steady Pressure
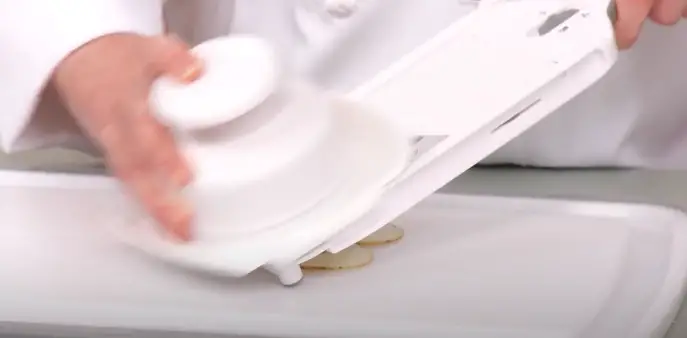
- Apply steady pressure to the knob and move the slider in a continuous downward and upward motion over the blade.
- Maintain a consistent speed and pressure to achieve even and uniform slices.
Repeat and Adjust
- Repeat the slicing process until you have obtained the desired quantity of slices or have finished slicing the food.
- Adjust the thickness setting if needed for different slicing requirements.
Additional Tips for Optimal Slicing:
- Use firm fruits and vegetables for the best slicing results.
- For round produce like tomatoes or beets, use a knife to create a flat end before slicing.
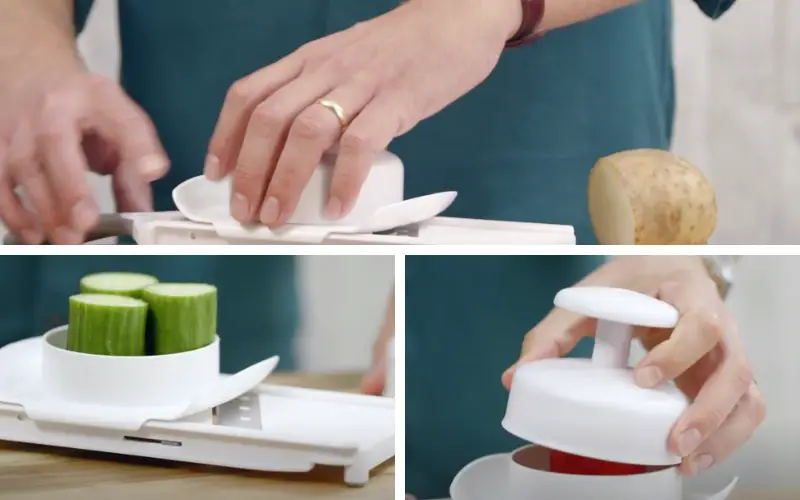
- When slicing larger foods such as zucchini or cucumbers, cut them into 2½” (6 cm) lengths before placing them vertically in the food holder.
Cleaning and Storage
Disassembling the Food Holder:
- Lift the food holder out of the slider.
- Hold the food holder upside down, allowing the knob to fall downward.
- Position your thumb on the center of the plate and unscrew the knob.
- The plate, holder, and knob will separate.
Cleaning the Blade:
Proper cleaning of the blade is essential to maintain its performance and longevity. Follow these instructions:
- Use a kitchen brush to remove any remaining food from the blade. Never hand wash the blade with a sponge or dishcloth.
- Never towel dry the blade; air drying is recommended.
Reassembling the Food Holder:
After cleaning, it’s time to reassemble the food holder. Follow these steps:
- Turn the food holder upside down, aligning the holes on the plate with the prongs.
- Feed the stem through the holder opening.
- Carefully push against the plate with your thumb.
- Use your other hand to tighten the knob.
- Insert the food holder back into the slider.
Proper Storage Techniques:
To ensure the longevity of your Simple Slicer and for safe storage, follow these guidelines:
- Place the slider on the track to cover the blade.
- Slide the button to the “locked” position.
Safety Instructions and Precautions
- The blade of the Simple Slicer is very sharp and can cause injury. Always keep your fingers away from the blade while using and cleaning the slicer.
- Follow the provided cleaning instructions and safeguards to ensure safe handling and maintenance.
- Keep the Simple Slicer out of children’s reach.
- Always use the food holder and slider when slicing. Do not attempt to slice any food that cannot be held securely by the food holder.
- When using the food holder, securely grasp the top, keeping your fingers and thumb away from the blade and within the outer edges of the slider.
- Remember, the blade and food holder prongs are sharp and may cause injury if not used properly.
Frequently Asked Questions (FAQs)
Is the Pampered Chef Simple Slicer dishwasher-safe?
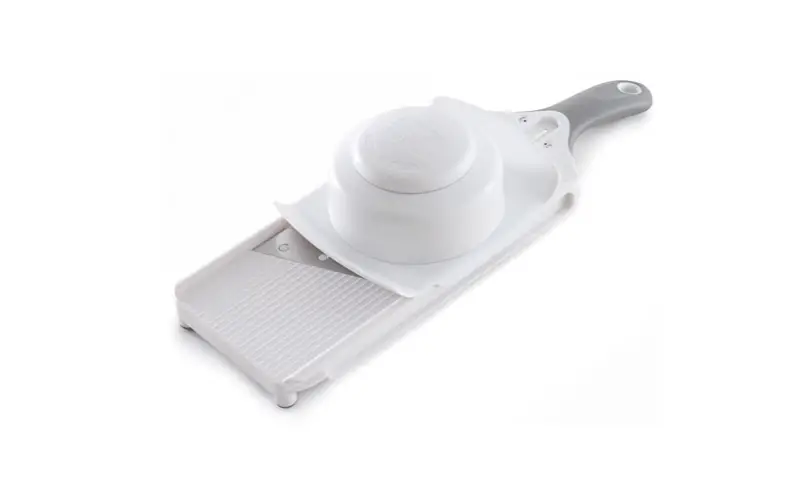
Yes, the Simple Slicer is dishwasher-safe, allowing for easy cleanup.
Can I adjust the thickness of the slices with the Simple Slicer?
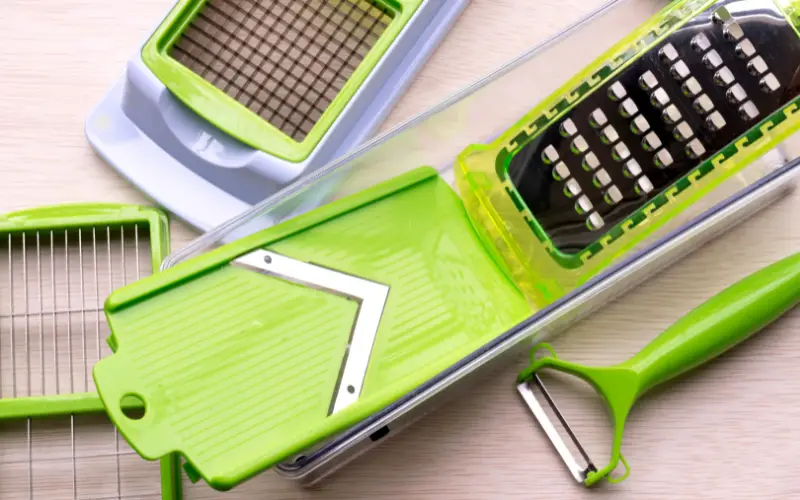
Absolutely! The Simple Slicer offers three different thickness settings: 1/16″ (2 mm), 1/8″ (3 mm), and 3/16″ (5 mm).
What are some tips for achieving the best slicing results with the Simple Slicer?
- Make sure the foods you slice are firm.
- For round fruits or vegetables, use a knife to create a flat end before slicing.
- Cut larger foods into appropriate lengths before placing them in the food holder.
- Slice two to three small vegetables at a time for the best fit on the prongs.
How should I store the Simple Slicer when not in use?
To safely store the Simple Slicer, place the slider on the track to cover the blade and slide the button to the “locked” position.
Is there a guarantee for the Pampered Chef Simple Slicer?
Yes, the Simple Slicer comes with a 1-year guarantee for noncommercial use. Please refer to your sales receipt for specific details.
Conclusion:
The Pampered Chef Simple Slicer is a game-changer in the world of kitchen slicing. With its adjustable blade and secure food holder, it allows for effortless and precise slicing of fruits and vegetables. The convenience of dishwasher-safe cleaning and the safety features make it a must-have tool for every home cook. Whether you’re looking to create thin, medium, or thick slices, this slicer has got you covered. Say goodbye to tedious slicing tasks and hello to the joy of effortlessly achieving perfect slices with the Pampered Chef Simple Slicer. Elevate your culinary experience and make slicing a breeze with this remarkable kitchen tool.
Key Notes and Important Points:
- The Pampered Chef Simple Slicer offers adjustable thickness settings of 1/16″ (2 mm), 1/8″ (3 mm), and 3/16″ (5 mm).
- Always use the food holder and slider together when slicing.
- Clean the blade with a kitchen brush and avoid handwashing with a sponge or dishcloth.
- Keep the Simple Slicer out of children’s reach and handle the sharp blade with caution.
- The Simple Slicer is dishwasher-safe for easy cleaning.
- Store the Simple Slicer by placing the slider on the track to cover the blade and locking it.
- Follow slicing tips for optimal results, such as using firm produce and preparing round or large foods before slicing.
Pros And Cons:
Here’s a 5-column table highlighting the pros and cons of the Pampered Chef Simple Slicer:
| Pros | Cons |
|---|---|
| Adjustable blade for varied thickness settings | Requires some practice for optimal slicing technique |
| Food holder ensures safe slicing and grip | May do not accommodate very large or irregularly shaped produce |
| Safety lock for secure storage | May require extra effort to clean blade thoroughly |
| Nonskid feet provide stability during slicing | Replacement parts may not be readily available |
| Dishwasher-safe for easy cleanup | Slightly higher price compared to basic slicers |
References And Citations:
Here are some suggested external links related to the Pampered Chef Simple Slicer, along with the corresponding anchor text:
- Pampered Chef Official Website – Pampered Chef
- Tips for Safe Slicing in the Kitchen – safety instructions
- Best Kitchen Slicers for Home Use https://thegrillingdad.com/grilling-tools-accessories/best-meat-slicers-for-home-use/ – best kitchen slicers
- How to Clean Kitchen Blades Properly https://www.masterclass.com/articles/how-to-clean-a-knife– cleaning blade instructions
- Simple Slicing Techniques for Perfect Results https://cooking.nytimes.com/guides/23-basic-knife-skills– slicing techniques.

John Hebdon is a food enthusiast, passionate chef, and author of various articles and blog posts related to food and cooking. With a deep love for all things culinary, John’s blog serves as a platform to share his extensive kitchen experiences with a broader audience.
In addition to his culinary expertise, John has a flair for writing and a natural ability to share his passion for food with others. His articles and blog posts are informative, engaging, and packed with practical tips for readers of all skill levels.
As a food enthusiast and writer, John is always on the lookout for new and exciting culinary experiences. Whether it’s trying out a new restaurant, experimenting with a new recipe, or simply sharing a favorite dish with friends and family, John is always eager to explore and share the world of food with others.


