A meat slicer is essential for cooking meat, cheese, or vegetables. However, the blade can become dull over time, making it difficult to cut through food cleanly and safely. Sharpening the blade is essential to maintain the slicer’s performance and ensure your food is sliced evenly. Sharpening blades can vary slightly depending on the type and condition of the blade. You should remove the blades and clean them thoroughly before sharpening. Sharpen the blades and disinfect them.
How To Know If The Meat Slicer Blade Is Dull?
Knowing when a meat slicer blade is dull, or needs sharpening can be an important part of food safety, as it affects how safe and consistent the slices of meat are.
Here are some signs to look out for that could indicate when it’s time to sharpen your meat slicer blade:
- The Blade Does Not Cut Cleanly: If the blade does not cut through meats cleanly and instead has jagged edges with pieces of meat still attached, it could indicate that the blade is dull and needs sharpening.
- The Slicing Process Takes Longer: If it takes longer to slice the meat, more so than you usually expect, it could be a sign that the blade is dull and needs sharpening.
- The Pieces of Meat Are Not Consistent In Size: If when slicing pieces of meat, they are not all consistent in size, some being thicker or thinner than others, despite using the same settings, it could mean that the blade is dull and needs some light sharpening.

The Pieces of Meat Are Not Consistent In Size - The Blade Is Making ‘Grinding’ Noises: When slicing if you hear any grinding noises from the meat slicer, this could indicate that it is time to sharpen the blade.
These signs indicate that it is time to sharpen the blade and ensure that your meat slicer produces consistent, clean slices each time.
When Do The Blades Of The Meat Slicer Needs To Be Sharpened?
The blades of a meat slicer need to be sharpened whenever they start showing signs of dullness. This is usually evidenced by the blade not slicing through food as easily as it used to or requiring more pressure than normal when making cuts.
The slices produced may look ragged or uneven and require a lot of force to move the food through the slicer. If these signs are present, the blades are no longer sharp and must be sharpened to ensure they can be cut cleanly and efficiently.
How To Sharpen A Meat Slicer Blade With Built-In Sharpener?

Clean the blade: Clean the slicer blade with water and a cleaning solution before sharpening. This will help remove any food particles or debris from the blade before it is sharpened.
Set up the sharpening kit: Assemble the equipment before sharpening your meat slicer blade. You’ll need honing steel, an oilstone (or water stone if you prefer), and an oil lubricant. The honing steel should be slightly harder than the material of the blade itself, while the oilstone or water stone should have a grit level appropriate for the blade material.
Sharpen the blade: Use a sharpening stone or honing steel to sharpen the blade. Start from the blade’s heel and work your way up to the tip in a circular motion, keeping the same angle throughout. This will create a consistent edge on both sides of the blade. Depending on how much metal you have removed, you may need to sharpen the blade several times.
Clean the blade and stone: Clean the blade of your meat slicer with a damp cloth before sharpening. Make sure all food particles and residue are removed. The stone you use to sharpen should also be cleaned with a damp cloth, as it will help create a better surface for grinding your blade.
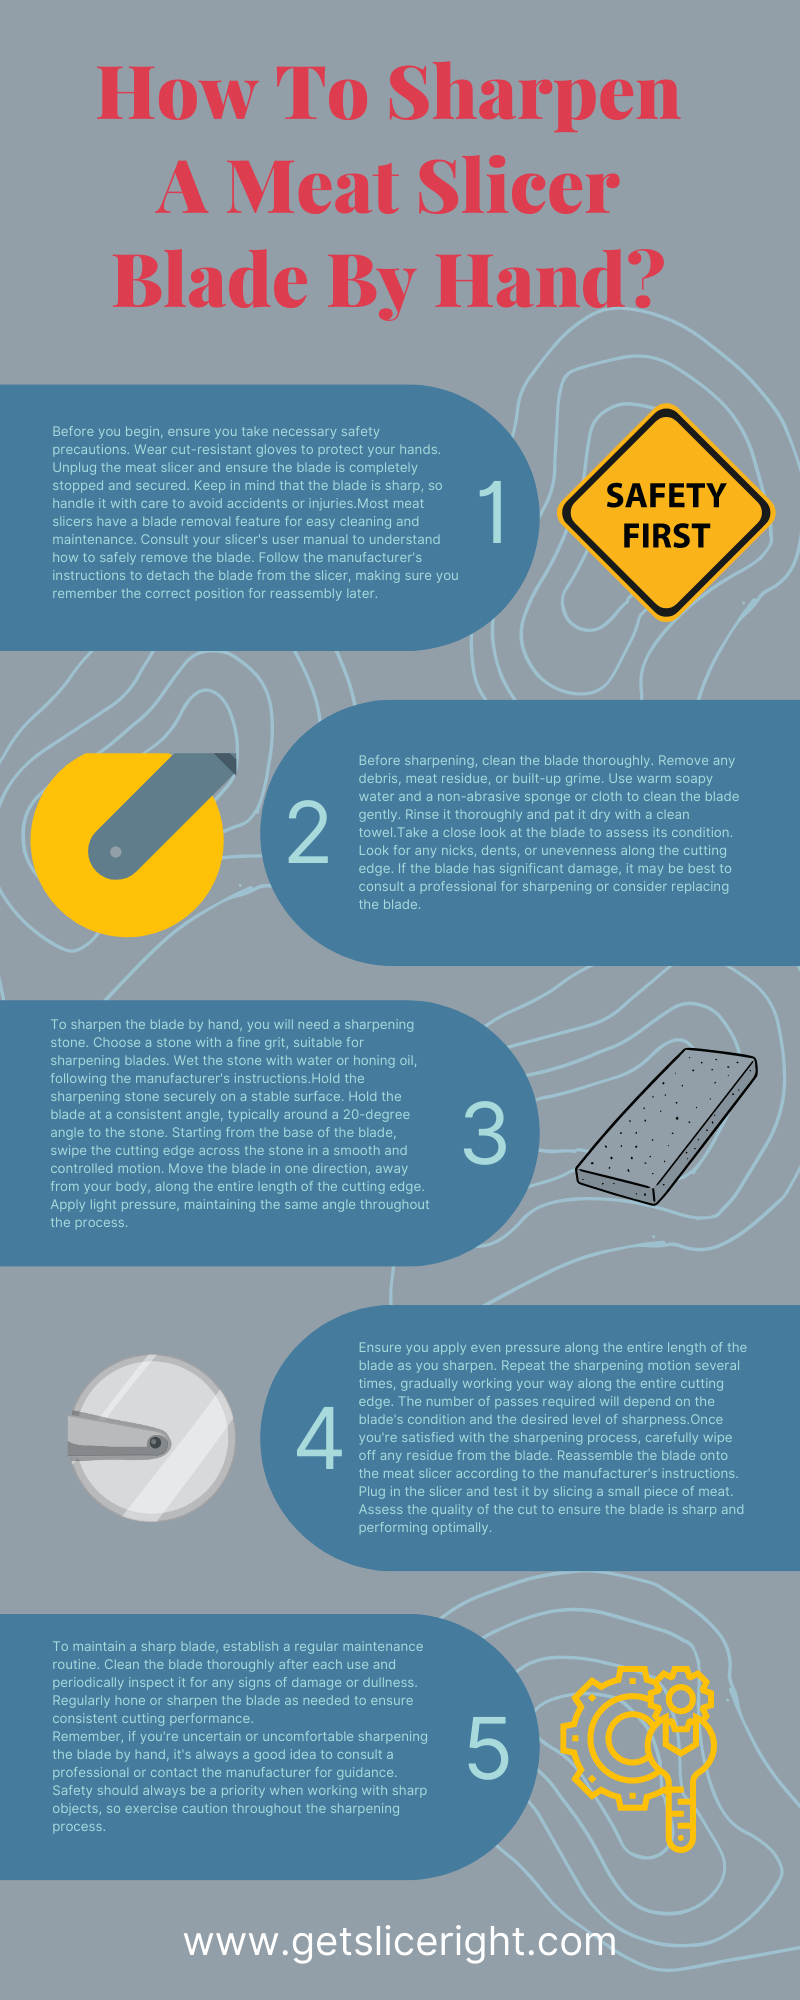
How To Sharpen A Meat Slicer Blade By Hand?
Step 1: Preparation: Unplug the meat slicer and remove the blade from the mounting. Wear heavy-duty gloves when handling a sharp meat slicer blade, as it can be dangerous.
Step 2: Collect the tools: You will need a fine grit stone, a medium grit stone, and a honing steel or rod. You can buy these tools at any hardware store. Ensure to get stones suitable for sharpening your slicer’s material, as some steels require different types of stones than others.
Step 3: Remove the blade from the machine: Turn off the power switch and disconnect it from its outlet. Open the slicer guard and use a screwdriver to remove the screws that hold the blade in place, using caution not to touch or cut yourself. Once all screws are removed, carefully remove the blade from the machine and place it in a secure area or on a cutting board.
Step 4: Sharpen the blade: Start from the blade’s center and move to one side. Keep the sharpening angle at about 20 degrees for a normal-sized meat-slicing blade. Then, sharpen the other side at similar points, starting from the middle and moving to each end.
Step 5: Check the blade’s sharpness: Once you have honed your blade, it is important to check its sharpness. Take a piece of paper and place it on a flat surface. Carefully slice the paper with the blade. If the blade cuts through effortlessly and cleanly, without ripping or tearing, then you know that the blade is sufficiently sharpened. However, if there are signs of the paper not being cut perfectly, you may want to go back and hone it a little more. Once the blade is sufficiently sharpened, your meat slicer is ready for use.

Step 6: Clean the blade: Once you’ve finished sharpening the blade, use a damp cloth to wipe away any dirt or residue. Make sure you get into all of the corners and crevices. After that, lubricate the blade with oil and let it sit for a few minutes before using it again. This will help keep it in good condition for longer.

Step 7: Disinfect the blade: After sharpening the meat slicer blade, it is essential to disinfect it to prevent bacteria and other germs from spreading. Begin by using a food-safe cleaner to clean off any residue that may be present on the blade. Once cleaned, dip a cloth or paper towel in rubbing alcohol or bleach solution. Wipe down the entire blade until completely disinfected.
Step 8: Reinstall the blade in the machine: Once you have finished sharpening it, it is time to put it back in the machine. Put the blade back on the slicer and secure it with the screws. Ensure all assembly components are securely fitted together so the blade does not come loose during operation.
Step 9: Checking the slicer: Once the sharpening is complete, you can use the slicer to test it. Cut a thin slice of meat and observe whether it comes out in a clean cut without any jagged edges or smears. If not, you may have to repeat the process until you get satisfactory results.
Tips To Keep Your Meat Slicer Blade Sharpened
- Keep the blade clean because food particles and buildup can dull it quickly. I cleaned with a soft damp cloth after each use, which is recommended.
- Always ensure the blade is properly lubricated with a light oil or machine grease for optimum performance.
- Regularly check the sharpness of the blade by slicing through a piece of paper.
- If you notice the blade is getting dull, use a sharpening stone to sharpen it back up. Start with a coarse grit and work up to a finer grit for best results.
- Be sure to store the blade when not in use properly. This will help to ensure it’s properly maintained and sharpened for years of reliable use.
FAQs
Is it hard to sharpen a thin blade?
It can be difficult to sharpen a thin blade by hand due to the risk of damaging it. If you are inexperienced or uncertain, taking your meat slicer blade to a professional sharpening service is best.
Do you sharpen both sides of the blade?
Yes, both sides of the blade should be sharpened. When sharpening a meat slicer blade by hand, beginning with the same number of strokes on each side is important. Doing an equal number of strokes on both sides will ensure that your blade remains balanced and performs optimally when cutting.
How often should a meat slicer be cleaned?
It is recommended to clean your meat slicer regularly, ideally after each use. This helps to remove food residue and bacteria that can accumulate over time. Cleaning the meat slicer will also help keep the blade sharp and reduce wear and tear on the machine.
What should I look for in a meat slicer?
Before you start to sharpen a meat slicer blade, it is important to ensure the slicer you are using is of good quality. It should have a durable construction and be made from high-grade steel that can handle the rigors of regular use. Look for adjustable blades with multiple settings to change the slice’s thickness.
What is the best way to sharpen a food grinder?
The best way to sharpen a food grinder is to use a sharpening stone or diamond-coated file. You can purchase these items from most hardware stores and online retailers. If you do not have access to these tools, you can also use a standard kitchen knife sharpener, although this will take more time and effort.
Conclusion
Sharpening a meat slicer blade by hand is difficult, but it can be done with the right tools. Before attempting this task, ensure that you have taken all of the necessary safety precautions to ensure your safety and the integrity of the blade. While sharpening a meat slicer blade by hand might take longer than other methods, it is a fast, safe, and cost-effective way to get the blade back in proper working order. If done correctly, the razor-sharp edge you will achieve will be worth all your effort.

Mario Batali is a renowned author, food enthusiast, and passionate chef who has dedicated his life to exploring the world of culinary arts. With a love for sharing his knowledge and experiences, Mario has become a prominent figure in the food blogging community, inspiring countless readers with his creativity and expertise.
In addition to his culinary prowess, Mario Batali is also a talented writer with a flair for engaging storytelling. He launched his own food blog to share his recipes, cooking tips, and personal experiences in the kitchen. Over time, Mario’s blog gained a loyal following of food enthusiasts who appreciate his unique approach to cooking and his dedication to using only the finest ingredients.
Mario Batali’s passion for food and his commitment to sharing his knowledge with others have made him a true inspiration in the world of culinary arts. Through his blog, cookbooks, and public appearances, Mario continues to spread his love of food and the joy of cooking with his ever-growing fanbase.