Troubleshooting problems with a Chef’s Choice meat slicer can seem daunting, but it can be relatively straightforward with a clear understanding of the machine’s operations and a systematic approach. Like any other electrical appliance, a meat slicer can run into issues ranging from dull blades and motor problems to difficulty adjusting slice thickness. These issues can impact the performance and safety of the machine.
Chef’s Choice Meat Slicer Smells Hot:
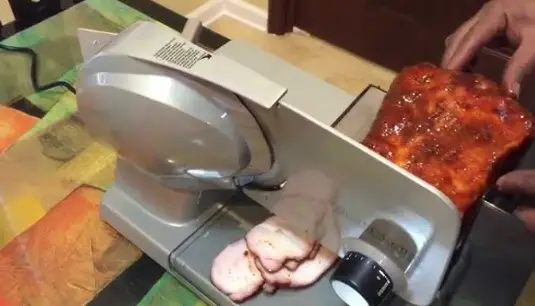
There could be several reasons for your chef’s choice of meat slicer to smell hot. One potential reason might be a new motor that was recently installed. Here are a few explanations for this issue:
- New motor: If the meat slicer has a new motor, it might emit a hot smell during the initial few uses. This is because the components and materials used in the motor, such as the insulation, grease, or paint, need to “break in” and release any residual chemicals or gases that were present during manufacturing. This smell should dissipate after a few uses.
- Overheating: If the motor works too hard or runs continuously for an extended period, it may overheat, leading to a hot smell. This can happen if the meat slicer is not used properly, such as slicing overly thick or frozen meat or not giving the motor enough time to cool down between uses. Following the manufacturer’s guidelines for proper usage and maintenance is essential to avoid overheating.
- Electrical issues: A hot smell can also indicate a potential electrical issue within the motor or other components of the meat slicer. Loose or damaged wiring, short circuits, or problems with the power supply can cause overheating and lead to a hot smell. If you suspect an electrical issue, having the meat slicer inspected and repaired by a qualified professional is crucial.
- Insufficient lubrication: The meat slicer’s motor and other moving parts require regular lubrication to function smoothly and prevent friction, which can cause overheating. If the slicer hasn’t been lubricated recently or the lubricant used is insufficient, it might cause the motor to overheat and emit a hot smell.
- Debris buildup: Over time, debris such as food particles, dust, and dirt can accumulate within the meat slicer and around the motor, making it work harder and leading to overheating. Regular cleaning and maintenance can help prevent this issue.
To resolve the hot smell issue, follow the manufacturer’s guidelines for proper usage, maintenance, and cleaning of the meat slicer. If the smell persists or worsens, consult a technician for inspection and repair.
Symptoms Of Chef’s Choice Meat Slicer Getting Hot:
- Burning smell: A strong, unpleasant odor, similar to burning rubber or plastic, emanating from the meat slicer while in use.
- Overheating: The slicer’s motor or other components feel unusually hot to the touch.
- Reduced performance: The slicer may become slow or struggle to cut through the meat.
- Unusual noises: The slicer may produce abnormal sounds, such as grinding or squealing, indicating internal friction.
Causes:
- Motor issues: A failing motor or other faulty components can lead to overheating or abnormal slicer functioning.
- Poor ventilation: Using the slicer in an area with insufficient airflow can cause it to overheat.
Solutions:
- Turn off the slicer and unplug it from the power source. Allow it to cool down completely before attempting to use it again.
- Clean the slicer thoroughly, removing any meat residue, dust, and debris from the blade, motor, and other components.
- Apply food-grade lubricant to the appropriate parts of the slicer, following the manufacturer’s instructions.
- If the issue persists, consult the manufacturer or a professional technician for a thorough inspection and potential repair or replacement of faulty components.
- Ensure proper ventilation around the slicer during use to prevent overheating.
Chef’s Choice Model 640,645,667 Meat Slicer Won’t Turn On
The Chef’s Choice meat slicer models 640, 645, and 667 may not turn on for various reasons, which can be related to electrical issues, mechanical problems, or user error. Here are some symptoms, causes, solutions, and precautions related to these issues:
Symptoms:
- No power or response when attempting to turn on the slicer.
- The motor hums but doesn’t turn the blade.
- Intermittent operation or inconsistent power.
Causes:
- Faulty power outlet or damaged power cord.
- A blown fuse or tripped circuit breaker.
- The slicer’s power switch is not engaged correctly.
- Motor issues such as worn brushes or a damaged commutator.
- Blocked or jammed blade.
Solutions:
- Verify that the power outlet is functional and the power cord is undamaged. You can locate the power switch under the meat tray, but sliding it left or right did not turn on the slicer.
- Inspect your home’s fuse or circuit breaker and replace or reset it as needed. A thermal fuse or self-resetting thermal breaker can help prevent issues by cutting off power to the slicer if it overheats, protecting the motor and other components from damage. If the thermal fuse is blown, it must be replaced; if the thermal breaker has tripped, it will reset itself when the device cools down.

Inspect your home’s fuse - Ensure the power switch under the meat carriage is flipped to the left or right.
- Consider the safety features of the slicer. There is a double security system in place to ensure safe operation. You have already tried sliding the power switch, but you also need to push the metal part of the tray while pushing it forward using your thumb. This action will engage a mechanism that presses an internal switch, activating the saw blade. The black plastic switch along the bottom side of the carriage serves as a safety feature to prevent accidental activation of the saw blade.
- Since the motor in these models has a commutator and brushes, a start/run capacitor is not required. To confirm this, disassemble the motor and visually inspect it for the presence of brushes and a commutator. Replace as necessary.
- Check for any obstructions in the blade area and clean or remove debris as needed.
Precautions:
- Always unplug the slicer before inspecting, cleaning, or servicing.
- Be cautious when handling the blade, as it can be very sharp.
- Perform routine maintenance and cleaning to prevent debris build-up and ensure smooth operation.
To Start The Slicer Properly:
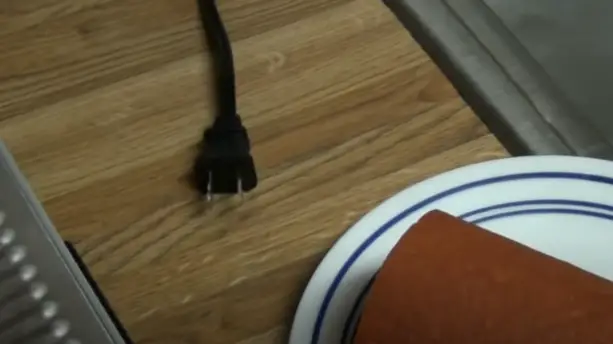
Step 1: Ensure the slicer is plugged into a functional power outlet.
Step 2: Flip the power switch under the meat carriage to the left or right (closest to you, away from the blade).
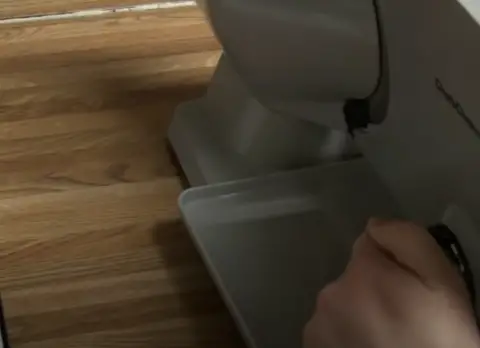
Step 3: Adjust the thickness using the numbered wheel, selecting a value other than zero.
Step 4: Place an onion (or other food item) on the sliding tray and hold it with your thumb on the plate facing you.
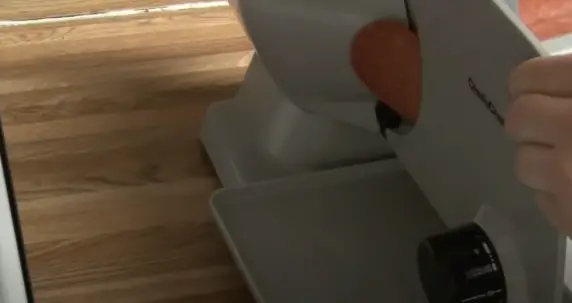
Step 5: Slide the tray back and forth to slice the onion to your desired thickness.
Chef’s Choice 610 Slicer Squeaks Loudly When Used How To Lubricate The Motor?
To lubricate your Chef’s Choice 610 slicer and reduce the squeaking noise, you can follow these steps:
Step 1: Unplug the slicer: Before starting any maintenance, ensure the slicer is unplugged to avoid any potential accidents.
Step 2: Remove the blade: Carefully remove the blade from the slicer to access the motor and the drive. Be cautious while handling the sharp blade.
Step 3: Locate the motor and drive : The motor and drive power the slicer. Look for any markings or holes labeled ‘oil’ on the motor.
Step 4: Clean the motor and drive: Before applying lubricant, clean any dust or debris from the motor and drive using a soft, dry cloth.
Step 5: Lubricate the motor bearings: Apply a few drops of lubricating oil, specifically designed for electric motors, into the oil holes or on the motor bearings. Be careful not to over-lubricate, as this can cause issues with motor performance.
Step 6: Lubricate the drive: Apply food-grade lubricant or grease to the drive gears to ensure smooth operation. Avoid using regular lubricants, as they may be unsafe for food-contact surfaces.
Step 7: Reassemble the slicer: Carefully reattach the blade to the slicer, ensuring it is properly aligned and secure.
Step 8: Test the slicer: Plug in the slicer and turn it on to check if the squeaking noise has been resolved. If the noise persists, you may need to repeat the lubrication process or consult the manufacturer for further assistance.
How To Remove Pinion Gear On A 609 Chef’s Choice?
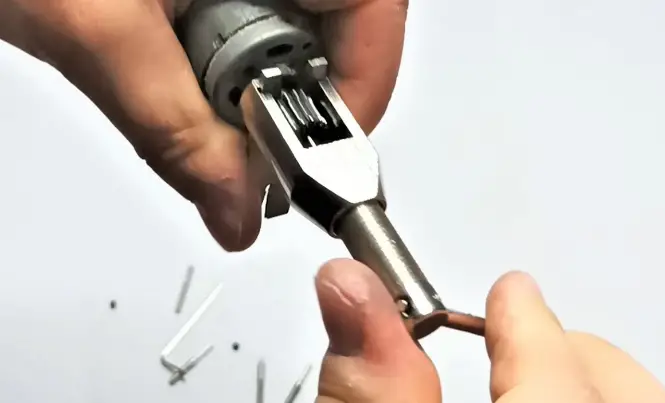
To remove the pinion gear on a Chef’sChoice 609 electric food slicer, follow these steps:
Step 1: Ensure the slicer is unplugged and the blade is fully retracted and locked.
Step 2: Remove the food carriage and the blade cover.
Step 3: Locate the pinion gear, the small gear meshing with the larger gear on the blade attached to the motor shaft.
Step 4: Use a small wrench or pliers to remove the retaining clip or screw securing the pinion gear in place.
Step 5: Gently pull the pinion gear off the motor shaft. It might be tight, so wiggle it back and forth or use a gear puller if necessary.
Step 6: With the pinion gear removed, clean and inspect it for damage. Replace it if worn or damaged.
Step 7: To reinstall the pinion gear, slide it back onto the motor shaft and secure it with the retaining clip or screw.
Step 8: Reassemble and test the slicer to ensure it works properly.
Conclusion

Removing or replacing parts on an electric food slicer can be dangerous and should only be attempted by someone with experience and the proper tools. If you are not comfortable performing these steps, it is recommended that you take your slicer to a certified repair center for service.

Mario Batali is a renowned author, food enthusiast, and passionate chef who has dedicated his life to exploring the world of culinary arts. With a love for sharing his knowledge and experiences, Mario has become a prominent figure in the food blogging community, inspiring countless readers with his creativity and expertise.
In addition to his culinary prowess, Mario Batali is also a talented writer with a flair for engaging storytelling. He launched his own food blog to share his recipes, cooking tips, and personal experiences in the kitchen. Over time, Mario’s blog gained a loyal following of food enthusiasts who appreciate his unique approach to cooking and his dedication to using only the finest ingredients.
Mario Batali’s passion for food and his commitment to sharing his knowledge with others have made him a true inspiration in the world of culinary arts. Through his blog, cookbooks, and public appearances, Mario continues to spread his love of food and the joy of cooking with his ever-growing fanbase.


