Short answer: To replace the wire on an OXO cheese slicer, unscrew the tension adjuster knob, remove the old wire, insert the new wire, and secure it.
<
Cheese slicers, such as the ones manufactured by OXO, are handy kitchen tools that make slicing through blocks of cheese a breeze. They’re efficient, easy to use, and provide consistent slices every time. However, with regular use, the wire on these slicers can become worn, dull, or even snap, rendering the slicer useless. To replace the wire on an OXO cheese slicer, remove the old wire by unscrewing the tension adjuster knob, then thread the new wire through the holes, ensuring it’s taut. Secure it by screwing the knob back in place.
What Makes The OXO Cheese Slicer Special?
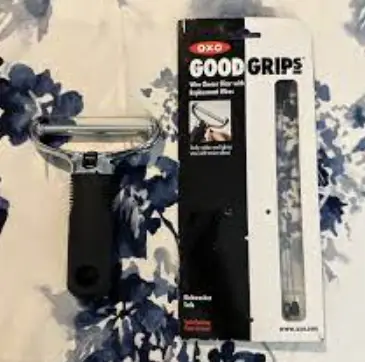
The OXO Good Grips Wire Cheese Slicer stands out from its competition thanks to its replaceable wires and the convenience it offers. The slicer’s stainless steel wire can be tightened with a tensioning wheel, which also helps to fix any wires that loosen over time. Furthermore, this durable kitchen tool boasts a sturdy die-cast zinc construction and a soft, comfortable handle for easy use.
How To Replace Wire On OXO Cheese Slicer?
Step 1: Start with the Replacement Wire: Identify the straight end of the replacement wire. OXO provides two stainless steel replacement wires in the package with the slicer, so you should have these ready for use when needed.
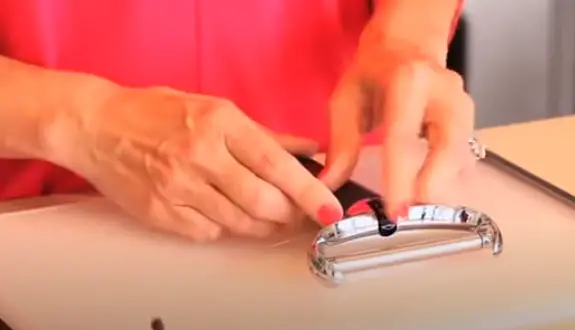
Step 2: Insert the Wire: Take the straight end of the replacement wire and feed it into the designated hole on the side of the wire cheese slicer. This is where the wire will be anchored.
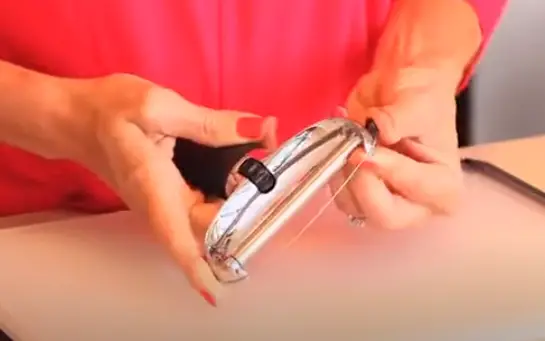
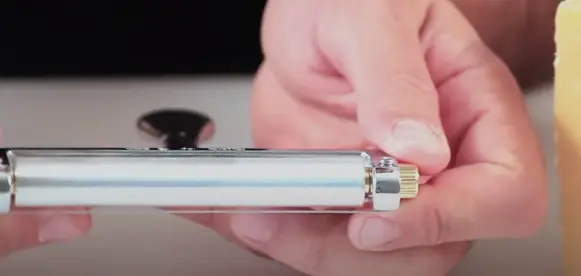
Step 3: Use the Tensioning Wheel: Locate the tensioning wheel on your slicer. Roll this wheel towards you, pulling the wire along with it. As you roll, the wire will begin to form a loop.
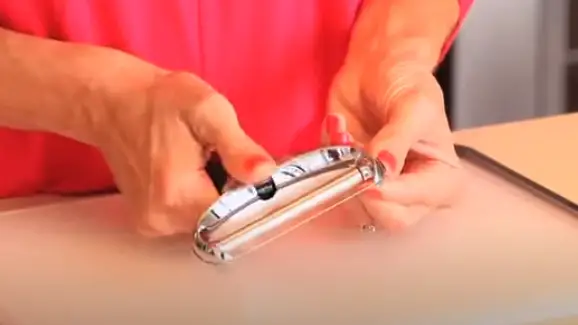
Step 4: Secure the Wire: Keep rolling the tensioning wheel towards you. As you do this, the wire will continue to pull through and the loop will get smaller. Continue this process until the wire is tight and taut.
Step 5: Final Checks: Make sure that the wire is secure and tight. The tensioning wheel is designed to help with this. If you notice that the wire is loose, simply adjust it using the tensioning wheel until you achieve the desired tension.
When To Replace Wires On OXO Cheese Slicer?[/su_heading]
Knowing when to replace the wire on your OXO Cheese Slicer is crucial for maintaining its effectiveness and longevity. Here are a few signs that it’s time for a change:
- Wire Dullness: If you notice that the wire is not cutting as efficiently as it used to, and the slices are not as neat and uniform, it might be a sign that the wire has become dull and needs replacement.
- Fraying Wire: A wire that shows signs of fraying is an indication that it’s weakening and could snap soon. In this case, it’s better to replace it sooner rather than later.
- Snapped Wire: If the wire has already snapped, then it’s definitely time for a replacement.
- Frequent Use: The more frequently you use the slicer, particularly with hard cheeses, the faster the wire will wear out. If you’re a heavy user, you might find yourself needing to replace the wire more often.
- Difficulty in Slicing: If slicing becomes harder and requires more force than usual, this could be a sign that the wire is worn out and needs to be replaced.
Remember, replacing your wire regularly will keep your cheese slicer performing at its best and extend its overall lifespan.
FAQs
Why should I use a cheese slicer instead of a regular knife?
Cheese slicers are designed to provide neat, uniform slices which can be hard to achieve with a regular knife. They also make slicing cheese easier and more efficient, especially when dealing with harder cheeses.
Can I use a cheese slicer on all types of cheese?
Cheese slicers work best on semi-hard to hard cheeses. Soft cheeses might stick to the slicer, and very hard cheeses may cause the wire to snap. It’s always best to check the manufacturer’s recommendations.
How do I clean my cheese slicer?
Many cheese slicers are dishwasher-safe, but it’s always best to check the care instructions that come with your specific model. For slicers that are not dishwasher-safe, warm soapy water and a soft cloth will do the job.
How often should I replace the wire on my cheese slicer?
This depends on how frequently you use the slicer and the type of cheese you cut. If you notice that the wire is getting dull, it’s a good time to replace it. Some models, like the OXO Cheese Slicer, come with a replaceable wire for this purpose.
Can I adjust the thickness of the cheese slices with my cheese slicer?
Yes, most cheese slicers allow you to adjust the thickness of your slices. With some models, you can do this by adjusting the angle at which you hold the slicer.
What materials are cheese slicers usually made from?
Cheese slicers can be made from a variety of materials, including stainless steel, metal alloys, wood, and plastic. The cutting wire is often made of stainless steel for durability and sharpness.
<
Conclusion
With the correct tools and a bit of patience, replacing the wire on your OXO cheese slicer is a simple task that doesn’t require professional assistance. By following the steps properly, you can restore your slicer’s efficiency and extend its lifespan, saving both money and reducing waste. It’s a straightforward maintenance task that any cheese lover should be able to accomplish.
Key Points:
- OXO cheese slicer has a sturdy die-cast zinc construction.
- The slicer features a replaceable stainless steel wire and a tensioning wheel for adjustments.
- It’s dishwasher safe and versatile, able to cut both thick and thin slices of cheese.
- To replace the wire, feed the straight end of the replacement wire into the side of the slicer and roll the tensioning wheel to create a loop, then continue until the wire is taut.
- Avoid overtightening the wire or using the slicer very hard.

Mario Batali is a renowned author, food enthusiast, and passionate chef who has dedicated his life to exploring the world of culinary arts. With a love for sharing his knowledge and experiences, Mario has become a prominent figure in the food blogging community, inspiring countless readers with his creativity and expertise.
In addition to his culinary prowess, Mario Batali is also a talented writer with a flair for engaging storytelling. He launched his own food blog to share his recipes, cooking tips, and personal experiences in the kitchen. Over time, Mario’s blog gained a loyal following of food enthusiasts who appreciate his unique approach to cooking and his dedication to using only the finest ingredients.
Mario Batali’s passion for food and his commitment to sharing his knowledge with others have made him a true inspiration in the world of culinary arts. Through his blog, cookbooks, and public appearances, Mario continues to spread his love of food and the joy of cooking with his ever-growing fanbase.


