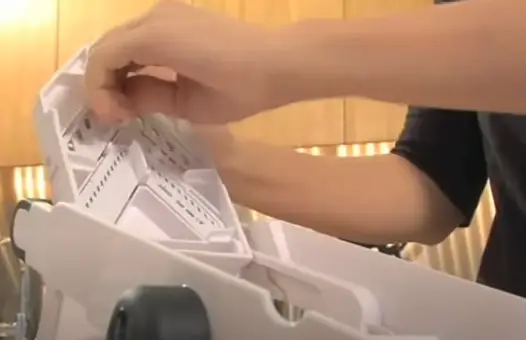
To assemble your OXO Mandoline Slicer, align and snap the Bottom Runway securely into place for stability. Reinsert the Julienne & Thickness Cylinder, ensuring it is dry, and use the soft knob to adjust the settings. Insert the Slicing Blade into the designated slot, making sure it is fully inserted and securely attached. Fold out the legs and lock them into place to enhance stability during slicing. Flip the Mandoline over, align the tabs on the Food Holder with the slots on the underside, and snap it firmly into position.
What is an OXO Mandoline Slicer?

The OXO Mandoline Slicer is a versatile kitchen tool that combines innovative features to make slicing fruits and vegetables quick and effortless. With its angled blade and top-view indicator window, switching between blade settings is a breeze. The slicer offers a range of 21 different cuts, allowing you to adjust the thickness in 0.5-mm intervals and choose from straight and wavy blades, as well as built-in julienne and French fry blades.
How to Assemble OXO Mandoline Slicer?
Step 1 – Snap the Bottom Runway Back into Place
To ensure stability during use, follow these simple steps to snap the Bottom Runway securely into position:
Align the Bottom Runway: Start by aligning the Bottom Runway with the designated slots on the Mandoline. This ensures that the slicer’s base is properly positioned.
Apply Gentle Pressure: Once aligned, apply gentle pressure to snap the Bottom Runway into place. Make sure to exert enough force to secure it firmly but avoid using excessive pressure that may damage the slicer.
Confirm Firm Attachment: After snapping the Bottom Runway, take a moment to confirm that it is firmly attached to the Mandoline. Gently wiggle it to ensure there is no movement or looseness. A stable attachment is essential for safe and effective slicing.
Stability Matters: A securely attached Bottom Runway provides stability during the slicing process, preventing unnecessary movements or wobbling. This stability allows for more precise and consistent cuts, ensuring excellent results in your culinary creations.
Step 2 – Reinsert the Julienne & Thickness Cylinder

Adjusting julienne and thickness settings is made easy with the Julienne & Thickness Cylinder.
Ensure the Cylinder is Dry: Before reinserting the Julienne & Thickness Cylinder, make sure it is completely dry. This prevents any moisture from affecting its functionality and helps maintain the accuracy of the settings.
Hold the Cylinder with the Soft Knob: To handle the Cylinder properly, hold it by its soft knob. This knob provides a comfortable grip and ensures safe manipulation of the settings. Hold the Cylinder with the Thickness Indicator pointing upward for clear visibility.
Flip up the Top Runway: Located on the top part of the Mandoline, the Top Runway covers the blades. Press on the OXO logo on the Top Runway to flip it up, exposing the area where the Cylinder will be inserted.
Insert the Cylinder into the Hole: Position the tip of the Cylinder into the hole on the side of the Mandoline body. This hole is specifically designed to accommodate the Cylinder, allowing for easy adjustment of julienne and thickness settings.
Snap the Soft Knob Down: Once the Cylinder is inserted into the hole, snap the soft knob down to secure it in place. This ensures that the Cylinder remains fixed and stable during use, providing accurate slicing results.
Step 3 – Reinsert the Slicing Blade

The Slicing Blade is an essential component of the OXO Mandoline Slicer that allows you to achieve precise and uniform slices.
Hold the Slicing Blade Safely: Prioritize safety when handling the Slicing Blade. Hold it by its soft handle to avoid any contact with the sharp cutting edge. This ensures that you can handle the blade comfortably without the risk of accidental cuts.
Slide the Blade into the Designated Slot: Locate the designated slot on the side of the Mandoline body where the Slicing Blade should be inserted. Slide the Slicing Blade into this slot, aligning it carefully with the blade track.
Ensure Full Insertion and Secure Attachment: Push the Slicing Blade fully into the slot until it is securely attached. You may hear a snapping sound or feel a slight resistance when the blade locks into place. Confirm that the blade is firmly inserted and does not move or wiggle.
Ready to Create Effortless Slices: Once the Slicing Blade is properly inserted and securely attached, you are now ready to create uniform slices effortlessly. Prepare your desired food item, position it against the Blade, and glide it along the runway for precise slicing results.
Step 4 – Fold the Legs Beneath the Body

Stability is crucial when using the OXO Mandoline Slicer.
Locate the Legs: Start by locating the legs positioned on the underside of the Mandoline. These legs are designed to provide stability and support during slicing.
Fold Out the Legs: With the Mandoline in front of you, fold out the legs by extending them away from the body. Ensure that each leg is fully extended to its maximum length.
Lock the Legs into Place: Confirm that the legs are locked into place by checking for any locking mechanisms or latches. This step ensures that the legs remain securely positioned during use, preventing any wobbling or slipping.
Verify Secure Positioning: Take a moment to verify that the legs are securely positioned beneath the body of the Mandoline. Gently shake or wiggle the slicer to ensure there is no movement or instability.
Step 5 – Snap the Food Holder onto the Tabs
The Food Holder is a crucial component of the OXO Mandoline Slicer as it securely holds the food you’re slicing.
Flip the Mandoline Over: Begin by flipping the Mandoline over to access the underside. This allows you to easily align and attach the Food Holder to the slicer.
Align the Tabs: Locate the tabs on the Food Holder. These tabs are designed to fit into corresponding slots on the underside of the Mandoline. Align the tabs on the Food Holder with these slots, ensuring a precise fit.
Snap the Food Holder Firmly: Once the tabs are aligned with the slots, apply gentle pressure to snap the Food Holder firmly into position. You may hear a clicking sound as it securely attaches to the Mandoline. This ensures that the Food Holder remains in place during slicing.
Verify Secure Attachment: Take a moment to verify that the Food Holder is securely attached to the Mandoline. Gently tug on the Food Holder to ensure it does not move or detach easily. This ensures stability and prevents any unwanted movement of the food while slicing.
Disassembly & Cleaning:
- To clean the blades, pinch the tabs of the straight V-Blade until it releases and remove it.
- Press the button on the dial to unlock the position and flip open the bottom runway.
- Pinch the tabs of the crinkle V-Blade in storage until it releases and remove it.
- Flip up the bottom runway and remove it by pulling straight up and off.
- Remove the slicing insert by pulling up the tip.
- Flip open the top runway by pressing the tab at the top.
- Pull the tabs to remove both the julienne blade and French fry blade from under the deck storage.
- Slide out the top runway in the fully open position.
- Hand wash the blades with care and wash all other parts in the top rack of the dishwasher.
Reassembly & Storage:
- Attach the top runway by sliding it into the tabs in the fully open position.
- While the top runway is open, attach both the julianne blade and French fry blade to the under-deck storage by inserting the bottom ends first and snapping the top in place.
- Flip close the top runway.
- Attach the slicing insert by inserting the ends first and pressing down the tip.
- Attach the bottom runway by keeping it upright and sliding the hooks onto the pivot bar.
- Flip open the bottom runway.
- Place the crinkle V-Blade in storage by sliding the tips into the sockets and pressing it down until it catches.
- Close the bottom runway.
- Insert the straight V-Blade by sliding the tips into the side ramps and pressing it down until it catches.
- Press the button on the dial and turn to the lock position.
- Fold in the legs for convenient storage.
Conclusion
Now that you have assembled your OXO Mandoline Slicer and learned how to use it effectively, you can confidently slice a wide variety of fruits and vegetables with precision and ease. Remember to prioritize safety by using the hand guard and keeping your fingers away from the sharp blades.
FAQs
Can I use the OXO Mandoline Slicer without the hand guard?
It is strongly recommended to use the hand guard for safety purposes. Only professionals with extensive experience should consider using the Mandoline without the hand guard.
Are the blades of the OXO Mandoline Slicer dishwasher safe?
The blades should be hand washed with care. However, other parts of the Mandoline are generally safe for washing in the top rack of the dishwasher.
How do I maintain the sharpness of the blades?
Regularly hand wash the blades and handle them with care. Avoid contact with hard surfaces or utensils that may dull the blades. Proper storage in a dry place will also help maintain their sharpness.
Key Notes and Important Points
- Assemble your OXO Mandoline Slicer by snapping the parts into place.
- Use the Mandoline on a stable cutting board and position it perpendicular to you.
- Prepare the food by creating a flat surface and using the hand guard for safety.
- Hold the Mandoline steady and apply even pressure while slicing.
- Clean the Mandoline carefully, hand wash the blades, and store them in a dry place.
- The OXO Julienne Slicer is perfect for creating thin, uniform strips.
- The OXO V-Blade Mandoline Slicer offers versatility with its interchangeable blades.
- Safety should always be a priority when using any type of Mandoline slicer.
References And Citations:
Here are some suggested external links for the above article:
- OXO Mandoline Slicer – Official website of OXO, where you can find more information about the OXO Mandoline Slicer and its features.
- Knife Skills: How to Slice Fruits and Vegetables https://www.everydayhealth.com/diet-nutrition/knife-skills-how-to-cut-complicated-fruits-and-veggies/ – A comprehensive guide on knife skills for slicing fruits and vegetables, providing useful techniques and tips.
- Delicious Mandoline Slicer Recipes https://www.bonappetit.com/events/promotions/article/recipes-you-can-make-with-a-mandoline– Explore a collection of recipes that showcase the versatility of a mandoline slicer, inspiring creative dishes.

John Hebdon is a food enthusiast, passionate chef, and author of various articles and blog posts related to food and cooking. With a deep love for all things culinary, John’s blog serves as a platform to share his extensive kitchen experiences with a broader audience.
In addition to his culinary expertise, John has a flair for writing and a natural ability to share his passion for food with others. His articles and blog posts are informative, engaging, and packed with practical tips for readers of all skill levels.
As a food enthusiast and writer, John is always on the lookout for new and exciting culinary experiences. Whether it’s trying out a new restaurant, experimenting with a new recipe, or simply sharing a favorite dish with friends and family, John is always eager to explore and share the world of food with others.


