Cleaning your Beswood meat slicer is a simple process that ensures optimal performance and food safety. Start by gathering the necessary supplies such as cut-resistant gloves, cleaning solutions, and a small brush. Disassemble the slicer, clean each component separately. Pay special attention to the blade, using appropriate cleaning solutions and sterilizers. Reassemble the slicer and wipe down the exterior. Regular cleaning prevents bacterial growth and maintains the taste and texture of your sliced products. Remember to wear cut-resistant gloves for safety.
Beswood Meat Slicer
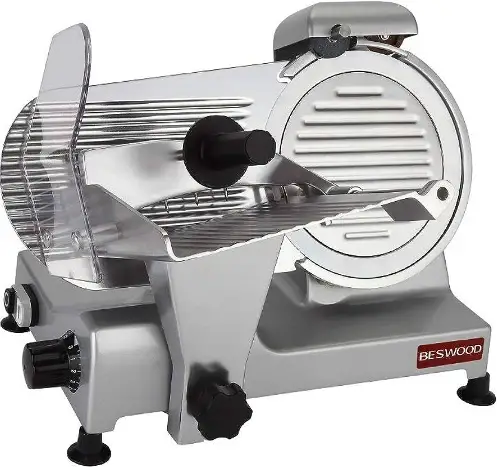
The Beswood Meat Slicer is designed to offer exceptional performance and durability. With its Chromium-plated coating and high-temperature treatment process, the High-Carbon & Chromium-plated Steel blade stays sharper for longer periods, minimizing the need for frequent sharpening. This coating also provides added protection against corrosion, ensuring the longevity of the blade. Equipped with a powerful and quiet motor, this manual gravity feed slicer effortlessly handles slicing tasks for both commercial and home users.
How To Clean My Beswood 10 Meat Slicer?
Gather the necessary supplies:
Before you begin cleaning, make sure you have the following supplies ready:
- Cut-resistant gloves: These gloves will protect your hands during cleaning.

Cut-resistant gloves - Disposable rubber nitrile gloves: These gloves can be worn over cut-resistant gloves for added safety.

Disposable rubber nitrile gloves - Dishwashing soap or non-toxic grease-removing cleanser: You can use dishwashing soap or a cleanser like Simple Green to clean the slicer.

Dishwashing soap or non-toxic grease-removing cleanser - Food-safe cleaner and sterilizer: Look for a food-safe cleaner and sterilizer, such as “Lysol Daily Cleanser Free From,” to ensure hygiene.

Food-safe cleaner - Small brush: A small brush, like a nail brush, will help you clean hard-to-reach areas.

Small brush - Green scrubby pad: This pad can be used to gently scrub away any residue.
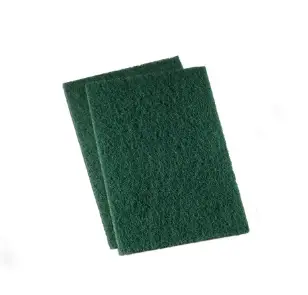
Green scrubby pad
Preparation:
Before you start cleaning, ensure that the slicer is unplugged and turned off. Also, remember to wear cut-resistant gloves to protect your hands throughout the cleaning process.
Disassembling the slicer:
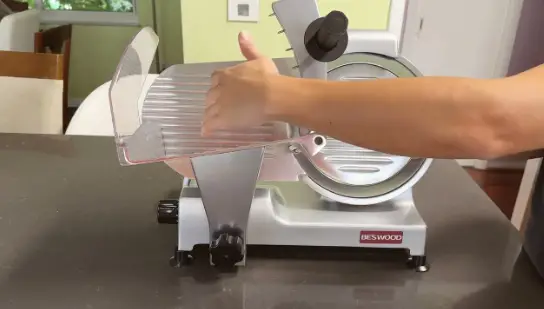
To thoroughly clean the slicer, you need to disassemble it.
- Unscrew the large knob to release the tray table. Clean the tray table separately.
- Unscrew the knob holding the built-in sharpener and wipe off any debris or residue. Avoid submerging it in water.
- Unscrew the large knob holding the blade guard. Before removing the guard, make sure the slice thickness knob is set to zero. Gently push the guard-forward, and it will drop into your hand.
Cleaning the components
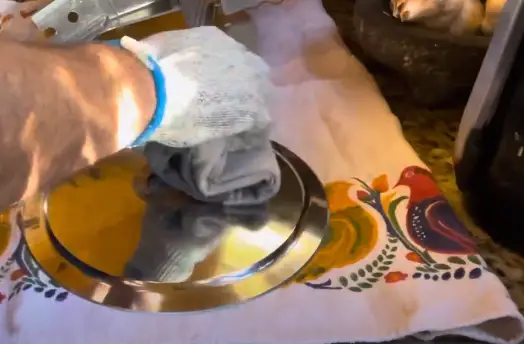
After disassembling your Beswood Meat Slicer, it’s time to clean each component thoroughly. Here’s how you can clean each part:
Tray table:
- Take the tray table to the sink.
- Use dishwashing soap or a grease-removing cleanser to clean the tray table.
- Scrub the surface of the tray table with a sponge or cloth, ensuring you remove any food residue or grease.
- Rinse the tray table thoroughly with water to remove any soap or cleanser residue.
- Dry the tray table completely before reassembling the slicer.
Built-in sharpener:
- Wipe the built-in sharpener with a damp cloth to remove any debris or residue.
- If the sharpener is greasy, use a non-toxic grease-removing cleanser to clean it.
- Gently scrub the surface of the sharpener with a cloth or sponge to ensure it is thoroughly cleaned.
- Wipe off any remaining cleanser residue.
- Ensure the sharpener is dry before reassembling the slicer.
Blade guard:
- Clean the blade guard in the sink using dishwashing soap or a food-safe cleaner and sterilizer.
- Use a small brush, such as a nail brush, to reach difficult areas and remove any debris or residue.
- Carefully scrub the blade guard, ensuring you clean all surfaces.
- you can use a green scrubby pad to gently scrub around the blade edge for any stubborn residue.
- Rinse the blade guard thoroughly to remove any soap or cleanser residue.
- Make sure the blade guard is completely dry before reassembling the slicer.
Cleaning the blade:
Cleaning the blade of your Beswood Meat Slicer is a critical step to ensure hygiene and optimal performance. Follow these steps to clean the blade effectively:
- Ensure the blade can spin freely: Before cleaning, make sure the blade is free to rotate without any obstruction. This will ensure easy access for cleaning.
- Spray the blade with a cleaner: Use a food-safe cleaner and sterilizer like Simple Green. Spray the cleaner onto the blade, covering the entire surface. Allow it to sit for a moment to loosen any stuck-on food particles.

Spray the blade with a cleaner - Wipe the blade thoroughly: Take a cloth or sponge and wipe the blade carefully. Ensure you remove all residue and particles from the blade. Pay attention to both sides of the blade and the edges.
- Sterilize the blade: For extra sterilization, spray the blade with a product like Lysol Daily Cleanser Free From. Allow the sterilizer to dry on the blade, following the instructions on the product.
Reassembling the slicer:
Once you have completed the cleaning process, it’s time to reassemble your Beswood Meat Slicer.
- Attach the blade guard: Place the blade guard back into position, ensuring it aligns correctly with the blade. Secure the guard by tightening the large knob.
- Attach the built-in sharpener: Position the built-in sharpener back onto the slicer and tighten the knob to secure it in place.
- Reattach the tray table: Place the tray table back onto the slicer, ensuring it fits properly. Secure the tray table by tightening the large knob.
Final touches:
To complete the cleaning process of your Beswood Meat Slicer, follow these steps for the final touches:
- Wipe down the exterior: Take a moment to wipe down the entire exterior of the slicer using a damp cloth. This will remove any remaining dirt, grease, or residue that may have accumulated during the cleaning process. Pay special attention to any visible areas that require extra cleaning.
- Check component tightness: Ensure that all components of the slicer, including the tray table, blade guard, and built-in sharpener, are properly tightened and secured. Gently wiggle each component to check for any looseness. If you notice any components that are not secure, tighten them as necessary to ensure the slicer is stable and safe to use.
Frequently Asked Questions
How often should I clean my meat slicer?
It’s recommended to wipe down your slicer when switching between different foods. For optimal hygiene, thoroughly clean the slicer every day, especially if it is used continuously. The FDA suggests cleaning meat slicers every 4 hours during continuous use.
Can I submerge the slicer in water for cleaning?
No, you should not submerge the entire slicer in water. Only the tray table and blade guard can be cleaned in the sink. Other components should be wiped down using appropriate cleaning solutions.
Can I use any cleaning products on my Beswood meat slicer?
It is important to use non-toxic cleaning products that are safe for food contact. Dishwashing soap, non-toxic grease-removing cleansers like Simple Green, and food-safe cleaners and sterilizers are suitable for cleaning your Beswood meat slicer.
Is it necessary to wear cut-resistant gloves when cleaning the slicer?
Yes, wearing cut-resistant gloves is crucial for your safety while operating and cleaning the meat slicer. Additionally, placing a tightly fitting disposable rubber nitrile glove over the cut-resistant glove adds an extra layer of protection.
Conclusion:
Keeping your Beswood meat slicer clean is essential for maintaining its performance, ensuring food safety, and prolonging its lifespan. By following the step-by-step cleaning process outlined in this article, you can easily and effectively clean your slicer. Regular cleaning removes food residue, prevents bacterial growth, and helps preserve the taste and texture of your sliced products. Remember to wear cut-resistant gloves for safety during the cleaning process. By incorporating regular cleaning into your routine, you can enjoy the benefits of a well-maintained Beswood meat slicer for years to come.
Key Points to Remember:
- Regularly clean your Beswood meat slicer to maintain performance, food safety, and product quality.
- Gather the necessary supplies, including cut-resistant gloves, disposable rubber nitrile gloves, cleaning solutions, and a small brush.
- Follow the step-by-step cleaning process, disassembling the slicer and cleaning each component separately.
- Pay special attention to cleaning the blade, using appropriate cleaning solutions and sterilizers.
- Reassemble the slicer, ensuring all components are properly tightened and secured.
- Wipe down the exterior of the slicer and maintain cleanliness throughout.
References And Citations:
Here are some suggested external links for cleaning the Beswood Meat Slicer, along with the corresponding anchor text:
- Simple Green – non-toxic grease-removing cleanser.
- Lysol Daily Cleanser Free From https://www.prnewswire.com/news-releases/new-lysol-daily-cleanser-kills-germs-around-the-home-using-only-three-simple-ingredients-with-no-harsh-chemical-residue-300646142.html – food-safe cleaner and sterilizer.
- Cut-Resistant Gloves https://ehs.unl.edu/sop/s-ppe-hand_protection.pdf– essential gloves for hand protection during the cleaning process.
- Nail Brush https://www.hygienetech.co.nz/product-category/products/hand-held-brushes/specialist-brushes-tools/ – a small brush recommended for cleaning hard-to-reach areas of the slicer.
- Green Scrubby Pad https://www.fishersci.com/us/en/browse/90150216/sponges-and-scrubbing-pads?page=1– a scrubbing pad mentioned for gentle cleaning around the blade edge.

John Hebdon is a food enthusiast, passionate chef, and author of various articles and blog posts related to food and cooking. With a deep love for all things culinary, John’s blog serves as a platform to share his extensive kitchen experiences with a broader audience.
In addition to his culinary expertise, John has a flair for writing and a natural ability to share his passion for food with others. His articles and blog posts are informative, engaging, and packed with practical tips for readers of all skill levels.
As a food enthusiast and writer, John is always on the lookout for new and exciting culinary experiences. Whether it’s trying out a new restaurant, experimenting with a new recipe, or simply sharing a favorite dish with friends and family, John is always eager to explore and share the world of food with others.


