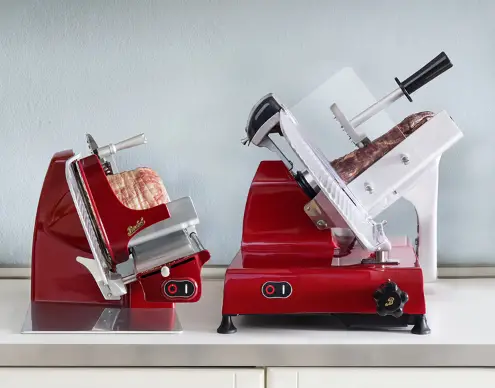
A Berkel meat slicer is a high-quality slicing machine used for preparing meats and cheeses. It is recommended to sharpen a Berkel slicer at least once or twice a year to maintain optimal performance. The specific sharpening procedure depends on the model, and it is important to follow the instructions provided. Always unplug the slicer and ensure it is turned off before sharpening. It is recommended to use the built-in sharpening system provided by Berkel for best results.
What is Berkel Meat Slicer?

A Berkel meat slicer is a high-quality slicing machine used for preparing meats and cheeses. Berkel slicers are considered some of the best in the market and are commonly used by various establishments, ranging from small neighborhood delis to large grocery store chains. These slicers are relied upon daily for their efficiency and precision.
How Often Sharpen Berkel Slicer?
To maintain optimal performance, following the Berkel slicer sharpening procedures at least once or twice a year is recommended. This frequency ensures that the knife remains sharp and enables the slicer to deliver consistent and efficient slicing results. However, it’s important to note that the exact sharpening frequency may vary depending on the frequency of use and the specific requirements of your slicing tasks.
How To Sharpen A Berkel Meat Slicer?
To sharpen a Berkel meat slicer, you can follow the instructions provided for different Berkel slicer models:
Instructions for sharpening a Berkel Slicer Model 825A/E, 827A/E & 832E:
- Turn off the slicer and ensure that the power cord is unplugged for safety.
- Close the gauge plate by turning the thickness control knob to the right. This will fully close the gauge plate, ensuring it does not interfere with the sharpening process.
- Wipe down the knife using a clean cloth or towel. Start from the center of the blade and move towards the outside edge. Be cautious not to move your hand toward the knife’s sharp edge to prevent any accidental injuries.
- Prepare the sharpener by loosening the locking knob and raising it. Rotate the sharpener so that the sharpening stones sit on each side of the knife. Once the stones are properly positioned, fasten the knob to securely hold the sharpener.

Prepare the sharpener - Plug in the power cord and switch on the slicer.

Switch on the slicer - Press the sharpening stone push-button to bring the stone against the knife. Apply firm but gentle pressure and hold it against the knife for about 5-10 seconds. This action will sharpen the knife’s edge. Release the push button after the desired time.

Start sharpening the blade - Next, press the deburring stone push-button to bring the deburring stone against the knife. Hold it against the knife for about 2-3 seconds. This step helps remove any burrs or rough edges left after sharpening. Release the push button after the specified time.
- Turn off the slicer and ensure that the power cord is unplugged.
- Return the sharpener to its storage position by reversing the steps taken in step 4. Loosen the locking knob, lower the sharpener, and ensure it is securely locked in place.
- Finally, clean the slicer following the cleaning and sanitizing instructions provided in the operator’s manual. Proper cleaning helps maintain hygiene and ensures the slicer is ready for use.
Instructions for sharpening a Berkel Slicer Model 909A & 919A:
- Turn off the slicer to ensure safety during the sharpening process.
- Change the shift lever to MANUAL. This will disengage the automatic slicing function and allow manual operation.
- Close the gauge plate by turning the thickness control knob to the right. This action fully closes the gauge plate, preventing interference during sharpening.
- Slide the product table towards you and remove it. Ensure the table is kept level to prevent sliding or rotation during the sharpening process.
- Lift the sharpener with your left hand and rotate it into the sharpening position. Lower it with one stone on each side of the blade. Hold the sharpener lever with your left index finger and pull it until it stops. This action brings the sharpening stones into contact with the knife.
- Switch the slicer on and hold the sharpener lever with moderate pressure for about 5-10 seconds. Apply consistent pressure to ensure proper sharpening. Release the lever after the specified time.
- Turn off the slicer to prepare for the next steps.
- Return the sharpener to its storage position by reversing the steps taken in step 5. Lift the sharpener, disengage it from the knife, and ensure it is securely locked in its storage position.
- Clean the slicer following the cleaning and sanitizing instructions provided in the operator’s manual. Proper cleaning helps maintain hygiene and ensures the slicer is ready for future use.
Instructions for sharpening a Berkel Slicer Model X13 & X13A:
- Turn off the slicer and ensure that it is in the manual setting. You can engage the manual setting by pushing the engagement knob to the left. The engagement knob is located on the right side of the support arm.
- Move the product table to make space for the sharpening process. Close the thickness control knob by turning it to the right. This action ensures that the gauge plate is fully closed.
- Prepare the sharpener by placing the top tab into the product table’s slot. The top tab should fit securely into the slot. Additionally, position the bottom sharpener clip over the end of the product table.
- Open the thickness control knob by turning it to the left. This action exposes the knife, making it accessible for the sharpening process.
- Switch on the slicer and slowly push the product table towards the knife. Take care to maintain a controlled and steady movement. When the sharpening and deburring stones touch the knife, hold the table in that position for 2-3 seconds. This allows the stones to effectively sharpen and remove any burrs from the knife’s edge.
- Turn off the slicer to prepare for the next steps.
- Close the thickness control knob by turning it all the way. This action ensures the gauge plate is properly closed and ready for regular slicing operations.
- Remove the bottom sharpener clip from the product table. Unclip it carefully, and make sure to clean the clip before storing it in a safe place.
- Clean the slicer following the cleaning and sanitizing instructions provided in the operator’s manual. Proper cleaning is essential for maintaining hygiene and ensuring the slicer is ready for future use.
FAQs:
Can I sharpen my Berkel meat slicer more frequently if needed?
Yes, you can sharpen your Berkel meat slicer more frequently if you find that the knife’s sharpness is diminishing or if the quality of the slices is not satisfactory. Regular inspections of the knife’s sharpness and the slices’ quality can help determine if more frequent sharpening is necessary.
What are the recommended steps for sharpening a Berkel slicer?
The specific steps for sharpening a Berkel slicer depend on the model. Refer to the instructions provided for your Berkel slicer model, which typically involves turning off the slicer, preparing the sharpener, performing the sharpening process, and cleaning the slicer afterward.
Do I need any special tools to sharpen a Berkel meat slicer?
Berkel slicers often come with built-in sharpeners. These sharpeners typically consist of sharpening and deburring stones. You may need to adjust the position of the stones and follow the specific instructions provided for your Berkel slicer model.
Is it necessary to unplug the slicer before sharpening it?
Yes, it is essential to turn off the slicer and unplug the power cord before starting the sharpening process. This ensures safety and prevents any accidental activation of the slicer while sharpening.
Can I use other sharpening methods or tools on my Berkel slicer?
It is recommended to use the built-in sharpening system provided by Berkel for sharpening your slicer. Other methods or tools may not be suitable and could potentially damage the slicer or compromise its performance.
Conclusion:
Sharpening a Berkel meat slicer is a crucial aspect of maintenance to ensure its optimal performance. Whether you have a Berkel Slicer Model 825A/E, 827A/E & 832E, Model 909A & 919A, or Model X13 & X13A, each model has specific instructions to follow. Regularly sharpening the knife helps maintain its sharpness, allowing for clean and consistent slices, and maximizing the efficiency of the slicing process.
Key takeaways:
- Maintenance is key: Regularly sharpening your Berkel meat slicer is crucial for optimal performance and clean, consistent slicing results.
- Follow manufacturer instructions: Refer to the specific instructions provided for your Berkel meat slicer model, as different models may have slightly different sharpening procedures.
- Unplug and turn off: Always unplug the slicer and ensure it is turned off before starting the sharpening process for safety purposes.
- Use the built-in sharpener: Berkel slicers often come with a built-in sharpening system, including sharpening and deburring stones. It is recommended to use this system rather than alternative sharpening methods or tools.
- Clean the slicer: After sharpening, make sure to clean the slicer following the cleaning and sanitizing instructions provided in the operator’s manual. Proper cleaning helps maintain hygiene and ensures the slicer is ready for use.
- Consult the operator’s manual: For detailed and accurate instructions, always refer to the operator’s manual specific to your Berkel meat slicer model.
References And Citations:
Here are some suggested external links related to the article with corresponding anchor text:
- Berkel Slicer Operator’s Manual https://www.theberkelworld.com/en/tutorial – Operator’s manual for Berkel slicers, including detailed instructions on maintenance and operation.
- Berkel Slicer Cleaning and Sanitizing Guide https://www.manualslib.com/manual/1955979/Berkel-X13-Plus.html– A comprehensive guide provided by Berkel for cleaning and sanitizing their slicers.

John Hebdon is a food enthusiast, passionate chef, and author of various articles and blog posts related to food and cooking. With a deep love for all things culinary, John’s blog serves as a platform to share his extensive kitchen experiences with a broader audience.
In addition to his culinary expertise, John has a flair for writing and a natural ability to share his passion for food with others. His articles and blog posts are informative, engaging, and packed with practical tips for readers of all skill levels.
As a food enthusiast and writer, John is always on the lookout for new and exciting culinary experiences. Whether it’s trying out a new restaurant, experimenting with a new recipe, or simply sharing a favorite dish with friends and family, John is always eager to explore and share the world of food with others.


