Short answer: To remove the motor from a Hobart meat slicer, first ensure it’s unplugged, then drain the oil, remove the three securing bolts, and gently tap the motor with a 2×4 and hammer until it loosens, avoiding any fragile parts.

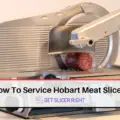
Hobart meat slicers are renowned for their durability and reliability, but even the best machines require maintenance and repairs from time to time. If you need to replace a faulty motor in your Hobart meat slicer, you may be wondering how to get it out. Removing the motor from a Hobart meat slicer is not a difficult process, but it does require some basic mechanical skills and knowledge of the machine’s components.
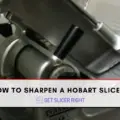
How To Get The Motor Out Of Hobart Meat Slicer?
Preparations
Before you embark on this task, make sure to turn off and unplug the meat slicer to prevent any accidents.
Step 1: Turn off the slicer: Safety always comes first. Make sure the slicer is off before starting your work.
Step 2: Unplug the slicer: Unplugging the slicer will further ensure your safety.
Draining The Oil And Removing The Bolts
Step 1: Drain the oil from the transmission: This can be done through the drain located at the bottom of the slicer.
Step 2: Remove the three bolts: There are three 19mm or three-quarters bolts to remove. One is visible, and the other two are hidden underneath the slicer.
Loosening The Motor

Step 1: Place a 2×4 on the motor: Ensure the 2×4 is placed on the robust part of the motor and not on the fragile collar.
Step 2: Tap with a hammer: With gentle taps, the motor should start getting loose.
Removing The Motor

Use a flat screwdriver: Once a gap is visible, use a flat screwdriver in the gap to pry out the motor.
FAQs
Can I use any other tool apart from a 2×4 and a hammer to loosen the motor?
While a 2×4 and a hammer are recommended due to their effectiveness and minimal risk of damage, if you have another technique that works and doesn’t damage the motor, you can use it. However, be cautious and gentle to prevent damage.
What happens if I damage the brackets or the collar while removing the motor?[/su_heading]
Damaging these components can make the reassembly process difficult and potentially harm the motor’s functionality. If these parts are broken, it’s advised to seek professional help or replacement parts.
Can I perform this task if I don’t have any technical knowledge or experience?
It’s possible, but not advisable. If you’re uncertain, it’s always better to hire a professional to avoid causing costly damages to your Hobart meat slicer.
Conclusion
Disassembling a Hobart meat slicer, specifically removing the motor, requires careful attention to safety and proper procedure. Always remember to disconnect the power source before starting, and make sure to keep track of all components and their placements to ensure correct reassembly. Don’t hesitate to consult the user manual or seek professional help if needed, as incorrectly disassembling the machine can cause damage or void your warranty. Remember, safety is paramount, and following the right steps will ensure that your Hobart meat slicer continues to operate effectively for many more meals to come.
Key Points
- Always prioritize safety – make sure the slicer is turned off and unplugged.
- Drain the oil from the transmission and remove the three bolts securing the motor.
- Use a 2×4 and a hammer to loosen the motor. Ensure you’re hitting the right spots to avoid damaging the motor.
- Use a flat screwdriver to pry out the motor once a gap is visible.
- Remember to be gentle during the process to avoid any damage.

Mario Batali is a renowned author, food enthusiast, and passionate chef who has dedicated his life to exploring the world of culinary arts. With a love for sharing his knowledge and experiences, Mario has become a prominent figure in the food blogging community, inspiring countless readers with his creativity and expertise.
In addition to his culinary prowess, Mario Batali is also a talented writer with a flair for engaging storytelling. He launched his own food blog to share his recipes, cooking tips, and personal experiences in the kitchen. Over time, Mario’s blog gained a loyal following of food enthusiasts who appreciate his unique approach to cooking and his dedication to using only the finest ingredients.
Mario Batali’s passion for food and his commitment to sharing his knowledge with others have made him a true inspiration in the world of culinary arts. Through his blog, cookbooks, and public appearances, Mario continues to spread his love of food and the joy of cooking with his ever-growing fanbase.