Short answer: To clean a KWS Kitchenware Station slicer, unplug the device, then disassemble and carefully wash the removable parts in hot soapy water. After drying, reassemble the parts, and remember to handle the blade with care due to its sharpness.
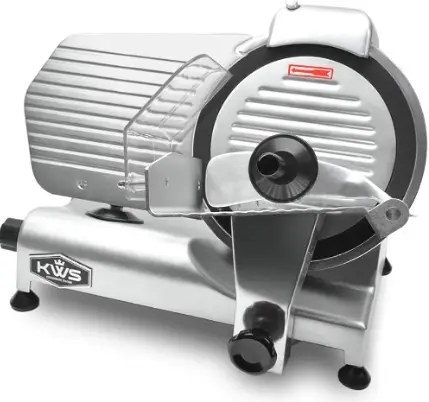
Cleaning your KWS Kitchenware Station slicer properly and regularly is essential for maintaining its performance and ensuring food safety. Given the various components and the presence of sharp edges, a careful, methodical approach to cleaning is necessary. A clean slicer not only operates more efficiently but also minimizes the risk of foodborne illnesses due to bacterial build-up. Whether you’re slicing meats, cheeses, or other foods, residues left on the slicer can pose a problem if not cleaned promptly and correctly.
Dismantling The Slicer
Step 1: Ensure your slicer is switched off and unplugged to avoid any accidents.
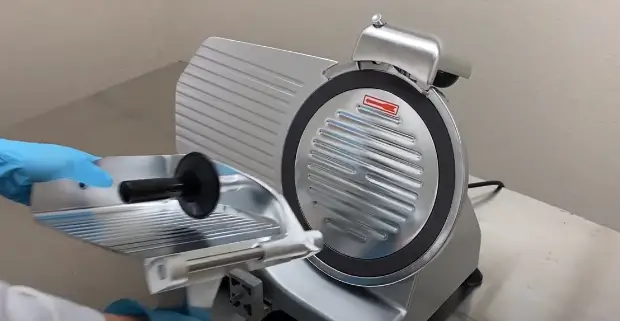
Step 2: Begin by removing the slider to expose the areas where meat residue typically hides. You’ll find a screw holding the plate. Once unscrewed, the plate will easily come off.
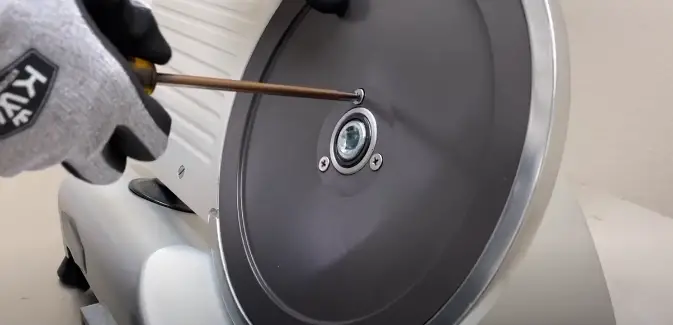
Step 3: The blade is your next target. This piece is heavy and extremely sharp. Make sure to set the blade guard back to zero before you begin. The blade is held in place with three screws. Gently unscrew these, pushing the blade from the backside to remove it. Caution is key when handling the blade!
Pro-tip: Use a large cookie sheet as a workstation when disassembling your slicer. It conveniently catches debris and soapy water, making your clean-up process a breeze!
Cleaning Process
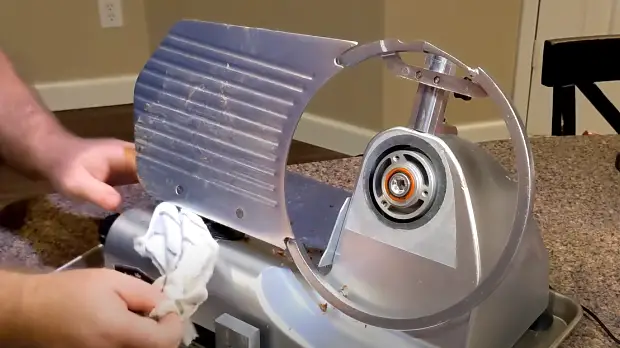
Step 1: After disassembling the slicer, it’s time to get down to the nitty-gritty. Start by wiping off the large chunks of debris from each part.
Step 2: For thorough cleaning, each part (except the blade) can be washed in the sink with hot soapy water. A good dish soap, such as Dawn, can help break down any oils or grease.
Step 3: As for the blade, wearing a protective glove is strongly recommended. It adds an extra layer of safety when you’re dealing with something as sharp as this blade.
Step 4: Certain areas of the slicer, like the gap beneath the knobs, may prove to be a bit tricky to clean. A wet paper towel or pipe cleaner can come to your rescue in these situations.
Blade Sharpening
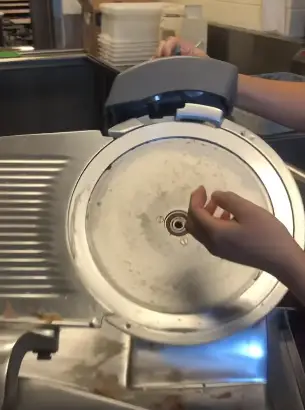
Step 1: Check Blade Adjustment: Before you start the sharpening process, ensure that your blade adjustment is set to zero. This prevents unnecessary contact with the blade.
Step 2: Locate Sharpening Buttons: Locate the two spring-loaded buttons on your KWS slicer. These buttons are designed to help you sharpen and polish your blade.
Step 3: Use the Sharpening Buttons: Press the two spring-loaded buttons to initiate the sharpening process. It’s important to note that this process may generate quite a bit of noise.
Step 4: Consider Safety Measures: Due to the noise level during sharpening, you might want to consider using earplugs to protect your hearing. Always remember to exercise caution during this process to avoid injury.
By following these steps, you can ensure that your KWS slicer blade remains sharp and efficient, providing you with precise and easy slicing every time.
Reassembling The Slicer
Here are the steps for reassembling your slicer once all the parts are clean and dry:
Step 1: Reattach the Blade: Begin the reassembling process by reattaching the blade to the slicer. Make sure it is secure.
Step 2: Fasten the Screws: After the blade is in place, proceed to fasten the screws. This helps to ensure the blade is securely attached and won’t move during operation.
Step 3. Fix the Plate and Slider: Now, reattach the plate and slider back to their original positions on the slicer. Ensure they are secure and can move freely as intended.
Step 4: Check Your Slicer: Before using the slicer, double-check that all parts have been correctly reassembled and are functioning properly.
FAQs
How often should I clean my KWS Kitchenware Station slicer?
It’s recommended to clean your slicer after each use to prevent bacterial growth and ensure it’s ready for the next use.
Can I use any type of cleaning solution to clean my KWS slicer?
Use a mild dish soap or a food-safe sanitizer for cleaning your slicer. Avoid using corrosive substances that can damage the machine.
Can I disassemble the KWS slicer for cleaning?
Yes, you can disassemble parts of the slicer for more thorough cleaning. Always refer to the user manual for proper disassembly and reassembly instructions.
How can I clean the blade of my KWS slicer safely?
When cleaning the blade, always be careful to avoid cuts. Use a soft cloth or sponge and gently clean both sides of the blade. For your safety, consider wearing cut-resistant gloves.
Can I put the parts of my KWS slicer in a dishwasher?
Not all parts of the KWS slicer may be dishwasher safe. Always refer to the user manual or contact customer service to ensure proper care.
What should I do if food particles get stuck in hard-to-reach areas of the slicer?
You can use a small brush to clean the corners and hard-to-reach areas of the slicer. Be sure to rinse thoroughly to remove any soap residue.
How should I dry the slicer after cleaning?
After cleaning, thoroughly dry all parts of the slicer to prevent rust or bacteria growth. You can use a dry towel or let the parts air-dry.
Is there any maintenance required after cleaning the slicer?
After cleaning, it’s a good practice to check the slicer’s functionality. You might need to lubricate some moving parts occasionally, according to the manufacturer’s instructions.
Conclusion
Cleaning your KWS Kitchenware Station slicer properly is an essential practice for maintaining its performance and ensuring the safety of the food you prepare. Cleaning should be carried out after each use to prevent the accumulation of food residues and potential bacterial growth. The process includes the disassembly of removable parts, careful cleaning with mild soap, thorough rinsing, and drying before reassembly. It’s critical to exercise caution when handling the blade and other sharp components. Also, occasional maintenance, like lubrication and blade sharpening, is necessary for the long-term functionality of your slicer. By keeping your KWS slicer clean and well-maintained, you can ensure it remains an efficient and reliable tool in your culinary adventures.
Key Notes: [/su_heading]
- Remove the slider and the plate by unscrewing them.
- Carefully take off the blade, considering its sharpness and weight.
- Each removable part, excluding the blade, can be washed in a sink with hot soapy water.
- Wipe off large debris before proceeding to detailed cleaning.
- Use a protective glove when cleaning the blade for added safety.
- Sharpen the blade using the blade sharpener that comes with your KWS slicer, remembering to adjust the blade to zero before sharpening.
- Reassemble your slicer once all parts are clean and dry.
- Avoid cleaning any parts of the slicer in a dishwasher to prevent discoloration of the metal.
- Store your slicer in a dry and clean place when not in use.

Mario Batali is a renowned author, food enthusiast, and passionate chef who has dedicated his life to exploring the world of culinary arts. With a love for sharing his knowledge and experiences, Mario has become a prominent figure in the food blogging community, inspiring countless readers with his creativity and expertise.
In addition to his culinary prowess, Mario Batali is also a talented writer with a flair for engaging storytelling. He launched his own food blog to share his recipes, cooking tips, and personal experiences in the kitchen. Over time, Mario’s blog gained a loyal following of food enthusiasts who appreciate his unique approach to cooking and his dedication to using only the finest ingredients.
Mario Batali’s passion for food and his commitment to sharing his knowledge with others have made him a true inspiration in the world of culinary arts. Through his blog, cookbooks, and public appearances, Mario continues to spread his love of food and the joy of cooking with his ever-growing fanbase.


