Carving and slicing are two common methods of preparing turkey. Both methods involve cutting the turkey into manageable pieces for serving, but there are distinct differences between them in terms of technique and presentation.
Carved turkey refers to the traditional method of separating the turkey into its constituent parts at the dinner table. Sliced turkey generally refers to turkey that is pre-cut, often in a kitchen setting, before being served. This method allows for uniform pieces, a neat presentation, and quicker serving. It can also be the more practical choice when dealing with large gatherings, catering, or for use in sandwiches and salads.
What Is Carving?
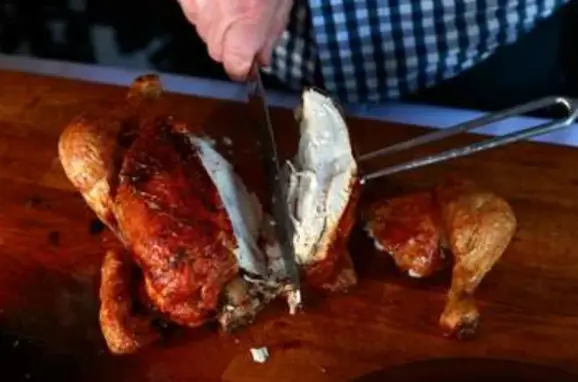
Carving refers to the artful technique of cutting a roast into serving pieces, typically a large one like a turkey or roast beef. This technique requires a longer, narrower, and pointier knife – commonly known as a carving knife. The carving knife’s design allows for more control and precision, which is ideal for cutting around the bones and joints.
Carving is an age-old culinary skill that involves cutting a large roast into serving-sized pieces. When we talk about turkey, carving primarily refers to the methodical deconstruction of the bird post-roasting. This involves separating the legs, thighs, wings, and breasts, followed by slicing the meaty parts into manageable portions. The use of a carving knife, long, narrow, and pointier than your regular kitchen knife, allows for precision and control, particularly around the bones and joints of the turkey.
What Does Slicing A Turkey Mean?[/su_heading]
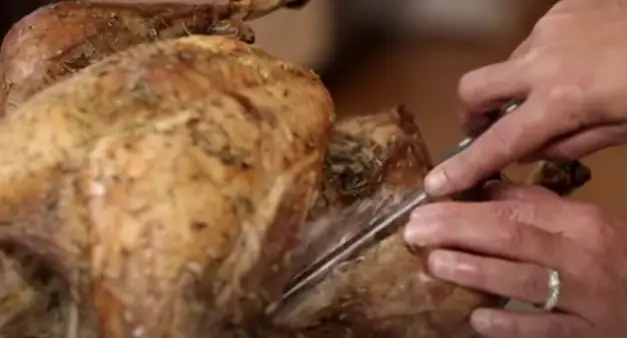
>Slicing a turkey refers to the process of cutting a cooked turkey into individual pieces or slices for serving. This process generally occurs after the turkey has been cooked and allowed to rest, which helps to preserve the juices inside the meat and enhances its flavor.
The slicing process typically begins with the removal of the turkey legs and wings. The breast meat is then cut into thin, even slices starting from the outer edge and working towards the center. The goal is to create uniform slices that are easy to serve and eat.
Slicing a turkey can be done in the kitchen before serving, which allows for more control over the size and uniformity of the slices and can help to speed up the serving process. It also enables a clean and organized presentation of the turkey on the serving platter.
<
Key Differences: Carved vs Sliced Turkey
Flavor:
Carving and slicing can influence the flavor profile of your turkey. Carving can allow more of the turkey’s natural juices to remain, enhancing the flavor. On the other hand, slicing can often help evenly distribute seasoning or marinade, providing a consistent flavor throughout.
Texture:
Texture plays a vital role in your turkey experience. A properly carved turkey will typically have a denser, meatier texture. Conversely, a sliced turkey is often thinner and more tender, providing a different mouthfeel.
Versatility:
Carving gives larger pieces, perfect for a holiday feast. Slicing, however, provides thinner cuts ideal for sandwiches, salads, and other leftover creations.
Presentation:
A beautifully carved turkey can make a striking presentation for a grand family dinner. While sliced turkey may not have the same visual impact, it offers a neat and convenient presentation for informal or buffet-style meals.
Time:
Carving a turkey can be time-consuming and requires a bit more skill. Slicing, being a more straightforward process, can be a quicker alternative.
Serving Size:
Carved turkey can often lead to larger serving sizes, while sliced turkey allows for more precise portion control.
How To Carve A Turkey?
Step 1: Let the Turkey Rest:
After removing your turkey from the oven, it’s crucial to let it rest for about 30 minutes before you start carving. This rest period allows the juices to redistribute throughout the turkey, ensuring that it stays moist and succulent.
Step 2: Set Up Your Carving Station:
Ensure you have a clean, flat surface to work on, a sharp carving knife, a carving fork for stability, and a large plate or platter to place the carved pieces. If possible, a carving board with grooves is helpful to catch any juices that run out.
Step 3: Separate the Leg and Thigh from One Side:
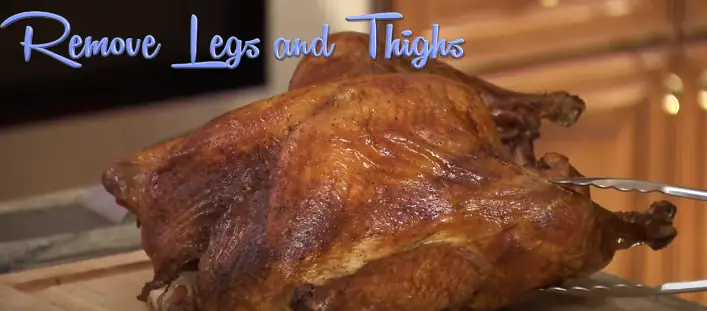
Hold the turkey steady with the carving fork. With your carving knife, cut through the skin between the turkey’s body and thigh, pushing the leg away from the body. Locate the joint connecting the thigh to the body, and cut through it. Do not try to cut through the bone; instead, cut through the joint where it’s easier.
Step 4: Separate the Drumstick from the Thigh Bone:
Again, you’re looking for the joint here, not the bone. Slice through the joint connecting the drumstick and the thigh, separating the two pieces.
Step 5: Remove the Breast and Wing from the Same Side:
Starting from the outer edge of the breast, slice down following the contour of the turkey’s body until your knife meets the bone. Repeat these slicing motions, gradually cutting deeper each time until the whole breast is removed. For the wing, locate the joint connecting the wing to the body, similar to the thigh and drumstick, and cut through it.
Step 6: Repeat with the Other Side:
Turn your turkey around and repeat steps 3, 4, and 5 on the other side.
Step 7: Slice Up the Breast and Thigh Pieces:
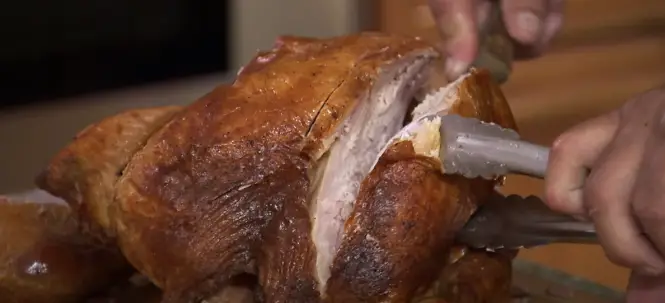
Once you have your larger pieces, you can cut them into smaller, more manageable slices. Hold the breast or thigh steady with your carving fork, then cut slices of your desired thickness with your carving knife.
How To Slice A Turkey?
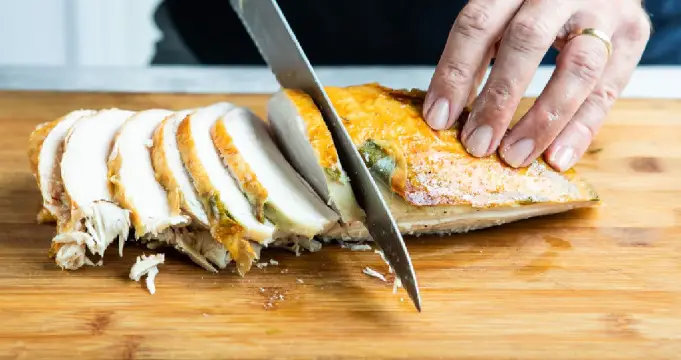
Step 1: Positioning Turkey
Before you start slicing, place the turkey on a large cutting board, breast side up. The wings should be facing you. This position provides stability and makes it easier to begin slicing.
Step 2: Removing the Legs and Thighs
- Locating the Joint: Begin by finding the joint that connects the thigh to the turkey’s body. This can be done by gently pulling the leg away from the body until the joint is exposed.
- Separating the Leg and Thigh: Cut through the joint with your knife to separate the leg and thigh from the turkey’s body. Do this for both sides.
Step 3: Separating the Wings:
Locate the joint that connects the wing to the turkey’s body. Cut through this joint, and the wing should easily separate from the body. Repeat this process with the other wing.
Step 4: Slicing the Breast Meat:
- Locating the Breastbone: The breastbone runs down the center of the turkey. Locating it is crucial because your slices will run parallel to this bone.
- Making the First Slice: Position your knife at the top of the breast, and make your first slice. It should be on one side of the breastbone and run parallel to it. Cut downward until your knife hits the bone.
- Making Parallel Slices: Continue making slices parallel to your first cut. Each slice should start from the top near the breastbone and cut down to the bone. Repeat this until you’ve sliced all the breast meat from one side, then do the same on the other side of the breastbone.
Step 5: Slicing the Thigh Meat:
With the thigh skin-side down on the cutting board, slice the meat off similarly to the breast. Since the thigh bone isn’t straight like the breastbone, you must follow its curve with your knife.
Step 6: Slicing the Wing Meat:
The wing can be tricky due to its shape and smaller size. The best approach is to find the joint in the middle of the wing, cut it apart, and then slice the meat off of each part.
By following these steps, you can ensure that every piece of your turkey is perfectly sliced and ready to be enjoyed by your family or guests.
FAQs
Does carving turkey dry it out?
No, carving does not inherently dry out a turkey. However, overcooking can. Resting the turkey before carving can also help retain its juiciness.
Is deli turkey meat healthy?
Yes, as long as you opt for low-sodium, minimally processed versions.
What are the different cuts of turkey?
Turkey can be broken down into breasts, wings, thighs, and drumsticks.
How long does carved turkey last?
Carved turkey can last for about 3-4 days in the refrigerator.
Should I carve the turkey the night before?
It’s best to carve the turkey before serving to preserve its juiciness and flavor.
How much sodium is in turkey breast?
Approximately 70mg per serving can vary based on preparation and seasoning.
What are the types of carving?
There are two main types: classical carving (usually of large roasts) and decorative carving (usually of fruits and vegetables for presentation).
Conclusion
<
Both carving and slicing methods of preparing turkey serve their unique purposes and can greatly enhance the dining experience. Carving turkey at the table can add a touch of ceremony and tradition to a meal, allowing for personalized slice thickness and presenting a whole, intact turkey for visual appeal. On the other hand, slicing turkey in the kitchen prior to serving provides uniformity in the pieces, eases the serving process, and offers a tidy presentation. The choice between carving and slicing often comes down to personal preference, the occasion, and the number of people being served.
Carved vs Sliced Turkey
| Method | Carved Turkey | Sliced Turkey |
|---|---|---|
| Preparation | Traditionally done at the dinner table | Typically done in the kitchen before serving |
| Presentation | The whole turkey is presented before carving, providing visual appeal | Pre-cut pieces are arranged neatly on a serving platter |
| Serving | Slices can be cut to individual preference | Uniform slices are ready for immediate serving |
| Suitability | Ideal for smaller gatherings and traditional ceremonies | Practical for larger gatherings and for making sandwiches and salads |
| Experience | Can add a sense of ceremony and tradition to the meal | Allows for a quicker and more efficient serving process |

John Hebdon is a food enthusiast, passionate chef, and author of various articles and blog posts related to food and cooking. With a deep love for all things culinary, John’s blog serves as a platform to share his extensive kitchen experiences with a broader audience.
In addition to his culinary expertise, John has a flair for writing and a natural ability to share his passion for food with others. His articles and blog posts are informative, engaging, and packed with practical tips for readers of all skill levels.
As a food enthusiast and writer, John is always on the lookout for new and exciting culinary experiences. Whether it’s trying out a new restaurant, experimenting with a new recipe, or simply sharing a favorite dish with friends and family, John is always eager to explore and share the world of food with others.


