Short answer: To replace the bearing in a Hobart slicer, disassemble the slicer, remove the old bearing, and install the new bearing in its place, ensuring proper alignment and secure fitting.
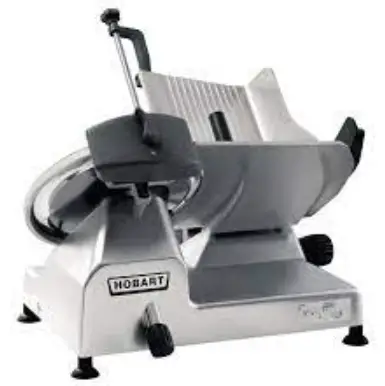
Hobart slicers are widely used in restaurants and commercial kitchens due to their durability, efficiency, and precision. However, like all machines, they can encounter issues over time. One common problem is a failing bearing, which can lead to inefficient operation or even damage the slicer. Fortunately, these bearings can be replaced, restoring the slicer to its optimal function. This task may seem daunting to those unfamiliar with the process, but with the right guidance, tools, and a methodical approach, it is certainly achievable.
Hobart Slicer Components
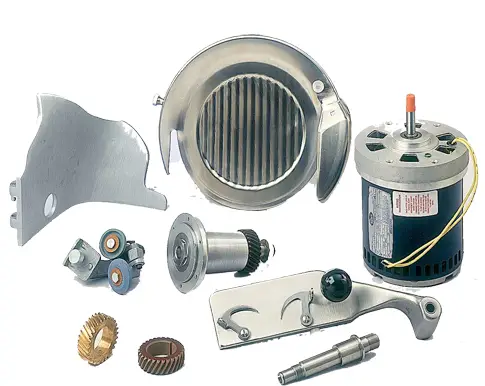
Before we begin, let’s understand the primary components of a Hobart slicer, particularly focusing on the parts that will be involved in our bearing replacement task.
- Slicer Carriage: The part of the slicer where the food product is placed for slicing.
- Blade: The rotating disc that performs the slicing operation.
- Bearing Assembly: Houses the bearings that allow the blade to spin smoothly.
Signs Of A Failing Bearing
- Frequent jamming: A failing bearing can cause increased friction and resistance in the slicer’s moving parts, leading to frequent jamming. If you notice that the slicer frequently gets stuck or stops during operation, it could be a sign of a worn-out or damaged bearing.
- Excess noise during operation: A failing bearing may produce excessive noise while the slicer is in use. This noise can range from grinding or squeaking sounds to abnormal rattling or clanking. Unusual or loud noises during operation indicate that the bearing may be deteriorating and needs attention.
- Uneven slices: A failing bearing can result in the slicer’s blade becoming misaligned or wobbling during operation. This misalignment can cause the blade to produce uneven slices, leading to inconsistent results in your food preparation.
Tools Needed For Bearing Replacement
- A set of screwdrivers
- A bearing puller
- A wrench set
- The new bearing
How To Replace The Bearing In A Hobart Slicer?
Step 1: Preparation:
Disconnect the Hobart slicer from the power source. Ensure you’re wearing proper safety equipment – gloves and safety glasses.
Step 2: Remove the Slicer Carriage:
Unscrew the slicer carriage knob and slide the carriage off the slicer arm. Keep the removed parts organized and easily retrievable.
Step 3: Removing the Blade:
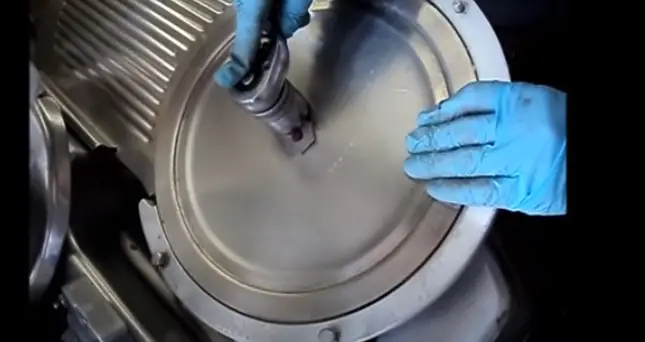
Remove the blade using a blade removal tool. The blade removal tool’s shape conforms to the blade’s shape, allowing you to safely remove it without direct contact.
Step 4: Accessing the Bearing Assembly:
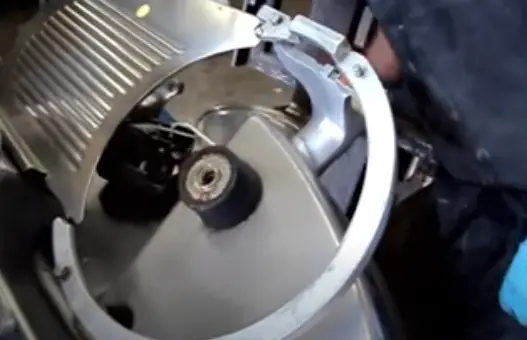
Once the blade is removed, the bearing assembly will be exposed. You should see the bearing retainer, a circular part holding the bearings in place.
Step 5: Removing the Bearing Retainer:
Use a screwdriver to remove the screws from the bearing retainer. Make sure to keep track of all screws. Once they’re removed, you can carefully lift off the retainer, revealing the bearings.
Step 6: Replacing the Bearings:
With the retainer off, you can now remove the old bearings. Once removed, replace them with the new bearings. Ensure they’re seated correctly and that they move freely.
Step 7: Reassembling the Slicer
Once the new bearings are in place, reassemble the slicer in the reverse order that you disassembled it. Ensure that all parts fit back together correctly and that all screws are tightened.
FAQs
How often should I replace the bearing in my Hobart slicer?
The frequency of bearing replacements depends on usage and maintenance. If the slicer is heavily used or not adequately maintained, the bearings may need to be replaced more often.
What type of bearing does a Hobart slicer use?
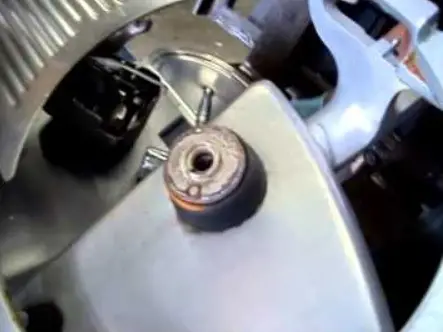
The type of bearing used in a Hobart slicer may vary depending on the model. Always refer to the user manual or contact Hobart service for specific details.
Can I use any generic bearing for my Hobart slicer?
It is recommended to use bearings specified by Hobart for your slicer model to ensure optimal performance and longevity.
Do I need a professional to replace the bearing in my Hobart slicer?
While the task is manageable for handy individuals, hiring a professional may be a safer option if you are unsure about any part of the process.
Conclusion
By following these steps, you can effectively replace the bearings in your Hobart slicer, ensuring its prolonged efficient performance. Keep in mind, regular maintenance and proper usage are key to ensuring the longevity of your Hobart slicer. Performing such maintenance tasks might seem daunting initially, but with practice, they can become a routine part of using your Hobart slicer.
Key Takeaways
- Identify the symptoms of a failing bearing early on, such as frequent jamming, excessive noise, and uneven slices.
- Gather the necessary tools: a set of screwdrivers, a bearing puller, a wrench set, and the new bearing.
- Disconnect the slicer from the power source before starting and ensure your workspace is clean and well-lit.
- Carefully disassemble the slicer, replace the old bearing, and install the new one before reassembling the slicer.
- Refer to the user manual for information specific to your slicer model and consider seeking professional help if unsure about any part of the process.

Mario Batali is a renowned author, food enthusiast, and passionate chef who has dedicated his life to exploring the world of culinary arts. With a love for sharing his knowledge and experiences, Mario has become a prominent figure in the food blogging community, inspiring countless readers with his creativity and expertise.
In addition to his culinary prowess, Mario Batali is also a talented writer with a flair for engaging storytelling. He launched his own food blog to share his recipes, cooking tips, and personal experiences in the kitchen. Over time, Mario’s blog gained a loyal following of food enthusiasts who appreciate his unique approach to cooking and his dedication to using only the finest ingredients.
Mario Batali’s passion for food and his commitment to sharing his knowledge with others have made him a true inspiration in the world of culinary arts. Through his blog, cookbooks, and public appearances, Mario continues to spread his love of food and the joy of cooking with his ever-growing fanbase.


