Short answer: To slice a flank steak, first let it rest after cooking, then cut it against the grain at a slight angle. Aim for thin slices, about 1/4-inch thick, to maximize tenderness.
Flank steak, a lean and flavorful cut of beef from the animal’s abdominal muscles, is known for its rich taste and fibrous texture. Though renowned for its robust flavor, its inherent toughness can be off-putting if not prepared correctly. A crucial part of preparing flank steak lies in the way it is sliced post-cooking. Slicing against the grain, or muscle fibers, of the steak is an essential step that ensures the meat is tender and enjoyable to eat.
How To Pick A Good Flank Steak?
Color: Look for a flank steak that is bright red in color. This is usually a good sign of freshness. Steaks that are dark or brown may be older.
Fat Marbling: While flank steak is a lean cut of meat, it should still have some thin streaks of fat throughout, known as marbling. These thin streaks of fat will render out when cooked, contributing to flavor and juiciness.
Size: Choose a flank steak that fits your needs in terms of size. Remember, a flank steak will shrink a bit when cooked, so it’s better to buy a larger piece than you think you’ll need.
Firmness: When you press the steak it should feel firm but not hard. If the meat feels soft or squishy, it might be old.
Smell: Fresh steak should not have a strong, unpleasant odor. If it does, it’s likely past its prime.
Packaging: If you’re buying pre-packaged steak, the packaging should be tightly sealed with no tears or leaks. Avoid packages with excessive liquid as this could indicate the meat is not fresh.
How To Slice A Flank Steak?
Method 1:
Step 1: Start by inspecting the Terrace Major steak. Observe the muscle fiber direction, it typically runs across the length of the steak.
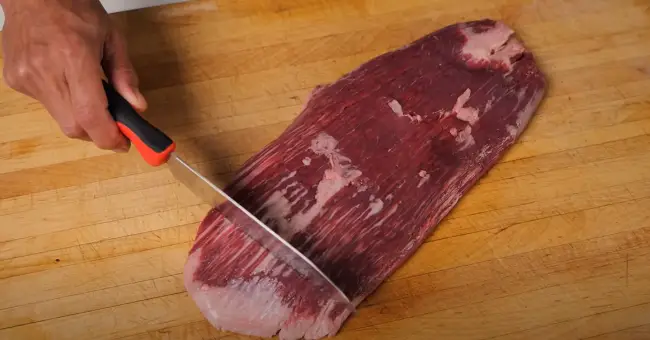
Step 1: Position your knife perpendicularly to the direction of the muscle fibers. You should be cutting directly across the grain to enhance tenderness.
Step 1: Slice the steak evenly, ensuring that you maintain the same angle relative to the grain throughout the cutting process. Each slice should be across the grain, not along it.
Step 2: After cooking the Terrace Major (such as using a reverse sear method), let it rest for a few minutes.
Step 3: Again, observe the direction of the grain. Even after cooking, the grain should be identifiable.
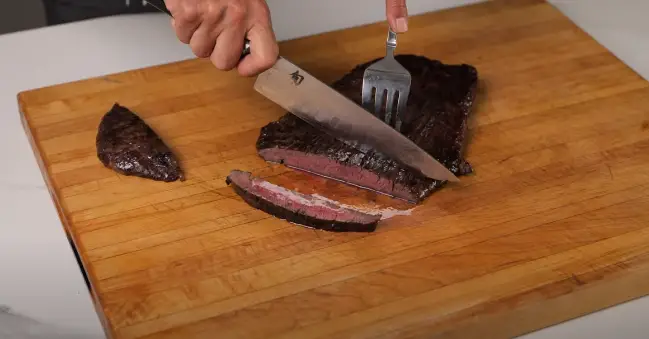
Step 4: Cut the cooked Terrace Major against the grain, similar to the initial raw cuts. This will shorten the muscle fibers and enhance tenderness.
Method 2:
Step 1: Start with a piece of flank steak. This cut is very popular for dishes such as fajitas or stir-fry.
Step 2: Before you begin cutting, place the flank steak in the freezer for about 30 to 45 minutes. This is to make it firmer and easier to slice thinly. It will be a bit harder than its natural raw state, but that’s alright for this process.
Step 3: Select a knife for this task. A serrated slicer can work very well for cutting firm, partially frozen meat.
Step 4: Take the flank steak out of the freezer and place it on your cutting board.
Step 5: Position your knife at a 45-degree angle to the steak. This angle is important for achieving thin slices.
Step 6: Using a steady sawing motion, cut the steak. Make the first cut at one end of the steak to remove the end piece.
Step 7: Continue cutting thin slices of the steak, maintaining the 45-degree angle and sawing motion throughout. Ensure each slice is as thin as you need it to be for your intended dish.
Step 8: After you’ve sliced the flank steak, you can let the slices thaw and prepare them for the next steps of your recipe, such as marinating or frying.
Method 3:
Step 1: Start with a whole flank steak. Notice the direction of the grain, it’s usually running lengthwise across the steak.
Step 2: Take your knife and gently slide it underneath some of the fat on the steak, pulling it off. Don’t remove all the fat, as flank steak is naturally a tough piece of meat and some fat is desirable for cooking. The fat will melt and help tenderize the meat as it cooks.
Step 3: If you notice any silver skin (a thin layer of tough, connective tissue), be sure to remove it. No matter how long it is cooked, the silver skin will never become tender. Trim it off wherever it’s visible.
Step 4: Turn the steak over to inspect the backside. If there’s a large pad of fat, don’t remove all of it. Simply thin it down a bit with your knife.
Step 5: Lightly trim off any extra fat from the edges of the steak. Be sure to maintain as much of the meat as possible.
Step 6: Your flank steak is now ready for cooking. You can either butterfly it (cut it in half horizontally and stuff it) or season it (for instance with salt and pepper) and place it directly on the grill.
Step 7: Grill the steak, but don’t let it cook past medium-rare. Any further, and the steak could become too tough to eat.
Step 8: Once cooked, let the steak rest for a few minutes. Then, when ready to slice, cut it at a slight angle against the grain. You can identify the grain by the lines running lengthwise across the steak.
Step 9: Make thin, angled cuts across the grain of the steak. This will ensure tender slices.
By following these steps, you’ll have a perfectly prepared and sliced flank steak. Remember, the key to tender flank steak is to leave some fat, remove the silver skin, not overcook it, and cut it against the grain at an angle.
<Method 4: Cutting Against The Grain On The Bias
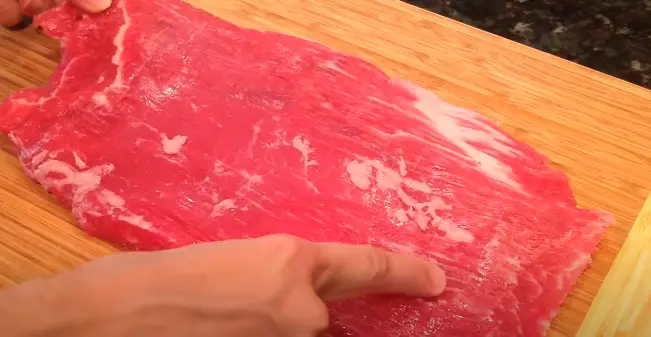
Step 1: Start by identifying the grain of the meat. The grain refers to the direction in which the muscle fibers run. Cutting with the grain would mean slicing parallel to these muscle fibers.
Step 2: However, for a tender bite, you want to cut against the grain, which means slicing perpendicular to the direction of the muscle fibers. This technique helps break down the muscle fibers and makes the meat easier to chew.
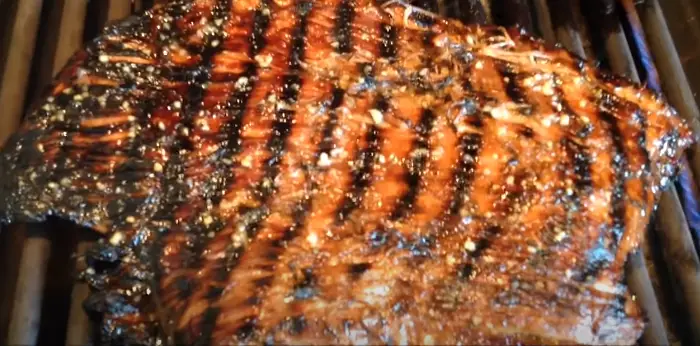
Step 3: After your meat has been grilled and has rested for a few minutes, you’re ready to slice it. Remember, the grains of the meat go in one direction, and you want to cut against that grain.
Step 4: Aim to cut the meat on a bias. The bias is the angle between cutting straight down and slightly angling your blade. By angling your blade, you create a cut that has more surface area, making the slices appear larger and more appealing.
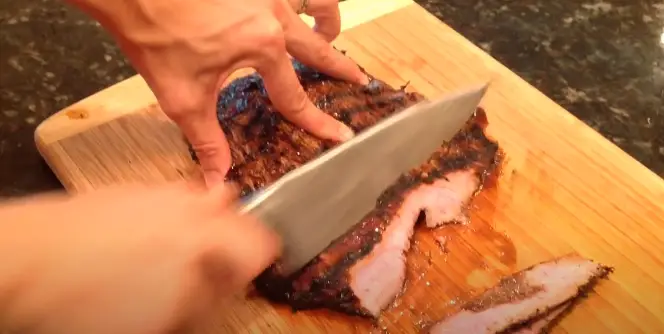
Step 5: Cutting against the grain and on a bias does not just improve the tenderness of the meat, it also improves the presentation. The slices will be wider and show off more of the meat’s interior.
Step 6: Proceed with cutting the meat against the grain and on a bias. Each slice should break down the muscle fibers and result in a tender, wide slice of meat.
Flank Steak For Stir-Fry Or Fajitas
Flank steak is flavorful but tends to toughen up with high-heat cooking methods like stir-frying or making fajitas. To keep it tender, you’ll need to cut it into very thin slices against the grain.
Step 1: Once you get your flank steak home, place it on your cutting board.
Step 2: Use one hand to hold one side of the steak in place.
Step 3: With a sharp chef’s knife in your other hand, slice the steak against the grain at a 10-degree angle. Work in long, smooth strokes to cut the meat.
Step 4: Continue slicing against the grain along the entire flank steak until you reach the end.
Step 5: To make the slicing process easier, you could freeze your steak for about 10 minutes before you start cutting. This slight firms up the meat, making it easier to cut thin, precise slices.
Step 6: Observe the thinness of the slices. This technique can also be applied when cutting chicken breasts or other meats for stir-fry.
FAQs
How do I grill the flank steak?
- Preheat your grill to high heat. Season the steak with your choice of spices or marinade.
- Place the steak on the grill and cook for about 5-7 minutes on each side for medium-rare, depending on the thickness of the steak.
- Once cooked, let the steak rest for a few minutes before slicing it against the grain to serve.
Can people substitute flank steak for skirt steak?
Yes, flank steak and skirt steak can often be substituted for one another in recipes. Both are flavorful and relatively tough cuts of beef that benefit from marinating and being sliced against the grain after cooking. They do, however, have different textures and flavors, so there might be a slight difference in the final dish.
What is the difference between the rump steak and skirt steak?
Rump steak comes from the hindquarter of the cow, specifically the area above the leg. It’s a lean cut that is typically tender and flavorful. Skirt steak, on the other hand, comes from the plate or the lower belly of the cow. It’s a long, flat cut known for its intense flavor, but it can be quite tough if not prepared correctly.
What is a good use for flank steak?
Flank steak is versatile and can be used in a variety of dishes. It’s often used in fajitas, stir-fries, and steak salads because it’s lean, flavorful, and cooks quickly. It’s also great for grilling or broiling.
Does flank steak get more tender the longer you cook it?
Not necessarily. Flank steak can become tough if overcooked. It’s usually best to cook it quickly over high heat to medium-rare or medium and then let it rest before slicing it against the grain. However, for certain recipes like braising or slow cooking, cooking for a long time can break down the connective tissues and make them tender.
How thick should flank steak be sliced?
When serving, flank steak should be sliced quite thin, about 1/4-inch thick or less. Slicing thinly against the grain helps to break up the long muscle fibers and makes the steak easier to chew. For cooking, it’s typically best to cook the steak as a whole piece and then slice it for serving.
<Conclusion
Properly slicing a flank steak can greatly enhance its tenderness and overall eating experience. By understanding the orientation of the grain and slicing against it at a slight angle, you can maximize the texture and flavor of this flavorful cut. So, whether you’re preparing a stir-fry, fajitas, or grilled flank steak, remember these simple steps for slicing. Enjoy your culinary journey and the succulent bites of perfectly sliced flank steak.

Mario Batali is a renowned author, food enthusiast, and passionate chef who has dedicated his life to exploring the world of culinary arts. With a love for sharing his knowledge and experiences, Mario has become a prominent figure in the food blogging community, inspiring countless readers with his creativity and expertise.
In addition to his culinary prowess, Mario Batali is also a talented writer with a flair for engaging storytelling. He launched his own food blog to share his recipes, cooking tips, and personal experiences in the kitchen. Over time, Mario’s blog gained a loyal following of food enthusiasts who appreciate his unique approach to cooking and his dedication to using only the finest ingredients.
Mario Batali’s passion for food and his commitment to sharing his knowledge with others have made him a true inspiration in the world of culinary arts. Through his blog, cookbooks, and public appearances, Mario continues to spread his love of food and the joy of cooking with his ever-growing fanbase.


