Short Answer: No, the Cuisinart Mini-Prep Plus Food Processor does not have a slicing function. It is designed primarily for chopping and grinding tasks.
The Cuisinart Mini-Prep Plus Food Processor is a compact and versatile kitchen tool that assists with a variety of small-scale food preparation tasks. However, it is designed for chopping and grinding and does not have a slicing function. Despite the lack of slicing capability, it still plays a pivotal role in modern kitchens due to its ability to swiftly process foods with a high degree of precision. It’s compact size and efficient performance make it an excellent choice for quick, everyday tasks such as chopping herbs, grinding nuts, or pureeing soft foods.
What Is A Cuisinart Mini-Prep Plus Food Processor?
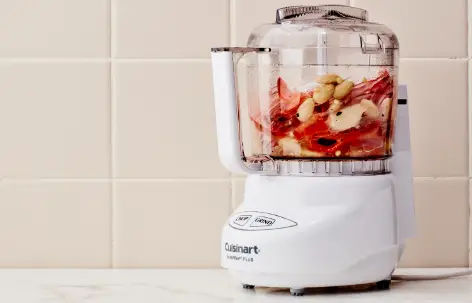
The Cuisinart Mini-Prep Plus Food Processor is a compact and powerful kitchen tool designed to perform various food processing tasks. With a durable, lightweight plastic body and a stainless steel blade. It is perfect for handling small food preparation tasks such as chopping vegetables, grinding nuts, and pureeing soft foods.
Does The Cuisinart Mini-Prep Plus Food Processor Slice?
No, the Cuisinart Mini-Prep Plus Food Processor does not slice. It is designed primarily to chop and grind food. For slicing tasks, you would need a different appliance, like a mandoline or a larger food processor that comes with slicing blades.
How To Use The Cuisinart Mini-Prep Plus Food Processor?
Chopping Food:
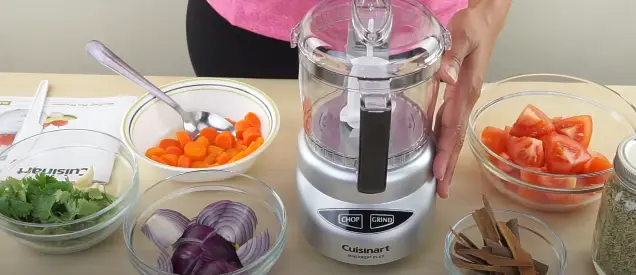
Step 1: Prepare the Food: First, wash and dry the food items you’ll be processing. Some food items, like onions or fruits, may need to be peeled and cut into chunks before processing. Remember that the size should be such that it fits comfortably into the bowl of the processor.
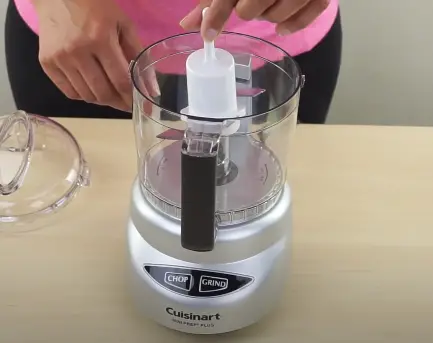
Step2: Install the Blade: Open the lid of the Mini-Prep Plus Food Processor, and carefully install the chopping blade onto the motor shaft. Be sure the blade is seated properly for efficient chopping.
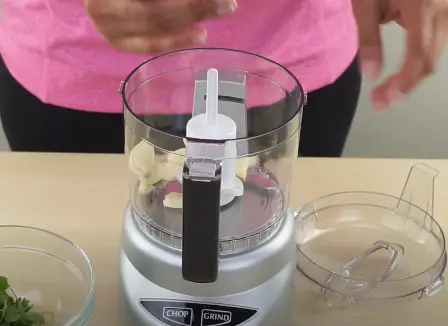
Step 3: Add the Food: Place the food items you want to chop into the bowl of the processor. Ensure not to overfill the work bowl; it’s usually recommended to fill the bowl no more than two-thirds full to ensure even chopping.
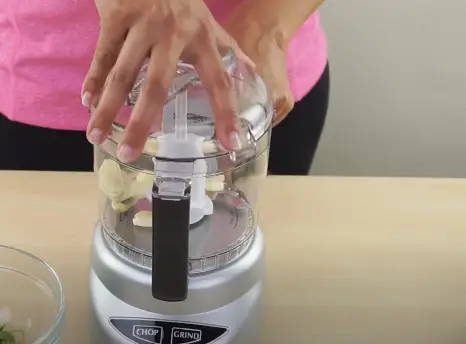
Step 4: Secure the Lid: Place the lid on the food processor. Ensure that it is securely locked into position. The Mini-Prep Plus has a safety feature that prevents it from operating unless the lid is correctly locked.
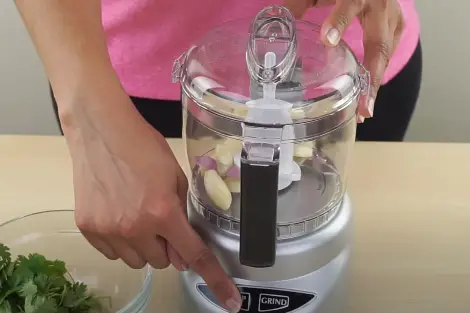
Step 5: Choose the Operation: For soft foods, use the “Chop” function. Press the “Chop” button, and the processor will start to chop the food.
Step 6: Pulse to Chop: For best results, use the pulse technique. Press the button in quick, even pulses for better control over the chopping. This allows food to drop back down onto the blade for even results.
Step 7: Check the Consistency: Periodically stop the processor and check the food’s consistency. If you need the food more finely chopped, continue pulsing until you achieve the desired consistency.
Step 8: Turn off the Processor and Unplug: Once you’ve achieved the desired consistency, release the “Chop” button. Always ensure to turn off the processor and unplug it from the power source before removing the lid and blade.
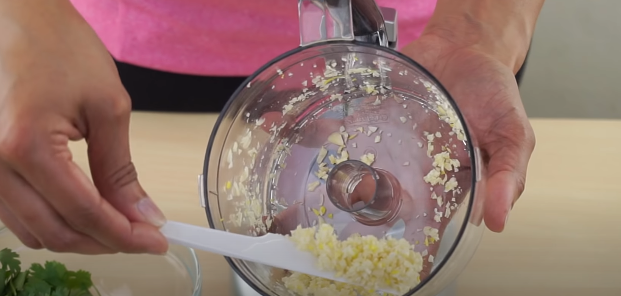
Step 9: Remove the Chopped Food: Carefully remove the blade first (watch out, it’s sharp!). Then, you can remove the chopped food from the processor bowl.
Grinding Food:
Step 1: Preparation: Before starting, ensure that the food processor is clean and dry. This is crucial for both hygiene and performance. Assemble the food processor by placing the bowl on the base and locking it into place. Insert the blade in the middle of the bowl.
Step 2: Adding the Food: Add the food items that you want to grind into the bowl. Remember to not fill it beyond the maximum fill line. Overfilling can lead to uneven grinding and can potentially damage the motor.
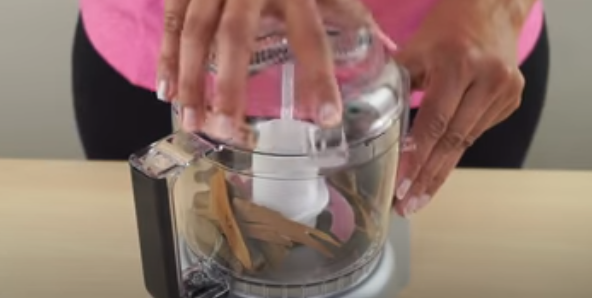
Step 3: Locking the Lid: Place the lid on the work bowl, aligning the long tab to the right of the rear column. Twist it counterclockwise to lock it in place. Make sure the lid is locked securely; otherwise, the processor won’t start, as a safety feature.
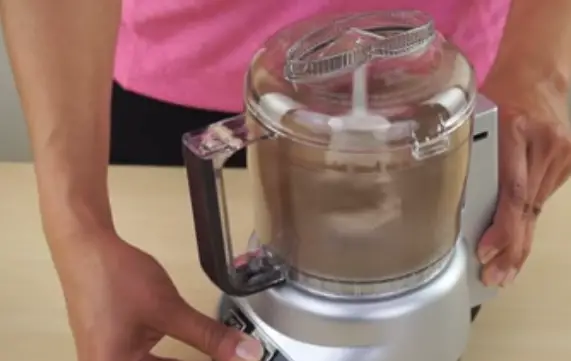
Step 4: Grinding the Food: On the control panel, press the ‘grind’ button. The food processor uses the blunt edge of the blade for grinding, which works well with hard food items like coffee beans, nuts, seeds, and spices.
Step 5: Checking the Consistency: Let the food processor run until the food is ground to your desired consistency. If you want a fine grind, you may need to run the processor for a little longer. If you prefer a coarse grind, run the processor for a shorter amount of time. You may need to stop the machine and scrape down the sides of the bowl with a spatula to ensure an even grind.
Step 6: Unloading the Food: Once you’re satisfied with the consistency, press the ‘off’ button to stop the machine. Always ensure the blade has fully stopped spinning before you remove the lid. Then, carefully remove the blade and pour out the ground food.
Step 7: Cleaning Up: After use, remove the work bowl and the blade from the base. These parts are dishwasher-safe (top rack recommended), which makes cleanup easy and convenient.
- Read the Manual: Before you begin, make sure you read and understand the user manual thoroughly. It contains important safety instructions and guidelines for operating the machine.
- Placement: Place the food processor on a stable, clean, and dry surface. Ensure that the surface is level and the processor is steady before using it.
- Blade Handling: Always handle the blade with care as it is extremely sharp. When inserting or removing the blade, do so carefully to avoid injury.
- Lock the Lid: Ensure that the lid is securely locked in place before the machine is turned on. The machine should not be operated if the lid is not properly secured.
- Fill Properly: Do not overfill the processor. This can lead to uneven chopping or the food spilling out. The maximum level for liquid ingredients is generally a bit lower than for solid ingredients.
- Do Not Overheat: Do not run the processor for too long continuously as it may cause the machine to overheat. If the machine begins to heat up, turn it off and allow it to cool down before continuing.
Tips For Maintaining The Processor
- Clean Regularly: Clean the processor after each use. Most parts of the processor are dishwasher safe, but you can also hand-wash them with warm, soapy water.
- Dry Thoroughly: After cleaning, make sure all parts are thoroughly dry before reassembling and storing the machine to prevent any potential mold or mildew buildup.
- Handle Blades with Care: The blades are sharp, so handle them carefully during cleaning. Also, ensure they’re completely dry before storing them to avoid rust.
- Regular Inspection: Regularly inspect your food processor for any signs of wear or damage. If you notice the blade becoming dull, or if any parts are cracked or damaged, they should be replaced.
- Proper Storage: Store the processor in a dry, clean area. It’s best to keep all the parts together so they’re readily available when you need them.
FAQs
Can you cut French fries with a Cuisinart food processor?
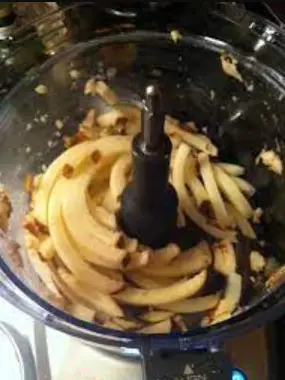
Yes, you can cut French fries using a Cuisinart food processor, but it may require a specific disc. A food processor with a French fry disc or a julienne disc is necessary for this task. Please note that while many Cuisinart food processors are equipped with slicing and shredding discs, not all of them come with a French fry or julienne disc. You would need to check the specifications of your particular model or potentially purchase the disc separately.
Can I shred cheese in my Cuisinart food processor?
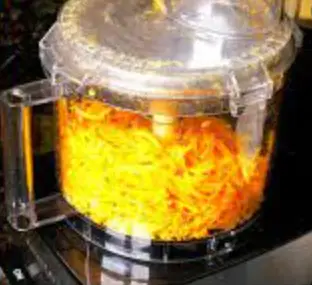
Yes, you can shred cheese using your Cuisinart food processor. This appliance is designed to handle tasks such as this with ease. It would be best if you used the shredding disc that comes with most Cuisinart models. Simply cut the cheese to a size that fits into the feed tube, attach the shredding disc, and you are good to go.
What size is a slice cut?
The size of a slice cut can vary based on the type of food being cut and the settings or tools used to cut it. In the context of a food processor, the slice thickness often depends on the adjustable slicing disc used. Some Cuisinart food processors come with adjustable slicing discs that allow you to choose the thickness of your slices, generally ranging from 1mm to 7mm. Therefore, the slice size can be quite thin or relatively thick, depending on your needs and preferences. Always refer to your specific model’s manual for precise slicing capabilities.
Is it easy to clean the Cuisinart Mini-Prep Plus Food Processor?
Yes, its parts are dishwasher-safe, which makes cleaning easy.
Can it be used for grinding spices?
Yes, the food processor can grind spices using its blunt edge. However, for finer grinding, a dedicated spice grinder might be a better option.
Conclusion
Although the Cuisinart Mini-Prep Plus Food Processor does not possess a slicing function, it is a great kitchen tool, especially for chopping and grinding tasks. Its ease of use, combined with safety features, make it an excellent addition to your kitchen.
Key Points
- The Cuisinart Mini-Prep Plus Food Processor is not designed for slicing.
- Its main functions include chopping and grinding.
- It features two speed buttons – low and high.
- Although it can grind spices, for finer grinding, a dedicated spice grinder is recommended.
- It has a safety feature where the machine won’t operate unless the lid is securely locked.
- All its parts that get dirty are dishwasher safe.

John Hebdon is a food enthusiast, passionate chef, and author of various articles and blog posts related to food and cooking. With a deep love for all things culinary, John’s blog serves as a platform to share his extensive kitchen experiences with a broader audience.
In addition to his culinary expertise, John has a flair for writing and a natural ability to share his passion for food with others. His articles and blog posts are informative, engaging, and packed with practical tips for readers of all skill levels.
As a food enthusiast and writer, John is always on the lookout for new and exciting culinary experiences. Whether it’s trying out a new restaurant, experimenting with a new recipe, or simply sharing a favorite dish with friends and family, John is always eager to explore and share the world of food with others.


