Short answer: Making garlic bread involves spreading a garlic-butter mixture on bread slices and applying heat until golden, with variations including adding herbs, spices, and optional toppings like cheese. Several cooking methods include oven-baking, air frying, and skillet-toasting.
Garlic bread is a popular and delicious side dish or appetizer that complements a variety of meals. It consists of bread slices infused with the flavors of garlic, butter, and herbs. Whether you’re preparing a meal for a gathering or simply want to enjoy a tasty snack, making garlic bread with bread slices is a straightforward process that can be easily done at home. With a few simple ingredients and some basic cooking techniques, you can create a flavorful and aromatic garlic bread that will delight your taste buds.
What Is Garlic Bread?
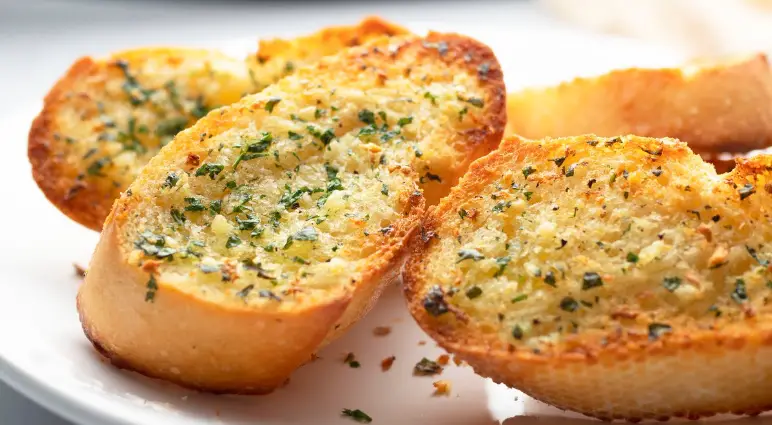
Garlic bread is a delightful blend of bread, usually a baguette or a similar type of crusty bread, spread with a mixture of butter, garlic, and often additional herbs like parsley. It’s typically baked or broiled until toasted, resulting in a satisfying combination of a crisp exterior and a soft, flavorful interior.
How To Make Garlic Bread With Bread Slices?
Method 1: Oven Method
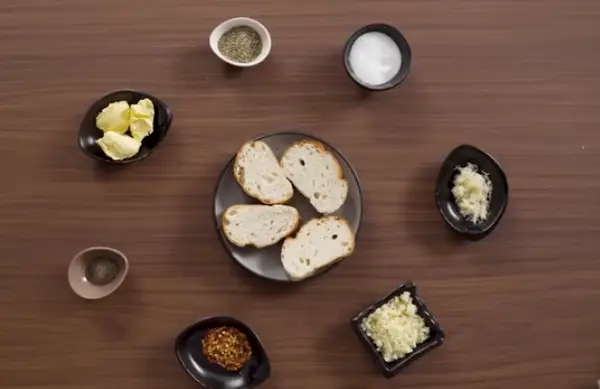
Ingredients:
- 2 tbsp butter
- 2 tsp garlic powder
- 1 tsp dried parsley
- Bread slices
Step 1: Gather your ingredients and combine them in a bowl. Ensure they’re mixed thoroughly to create a uniform spread.
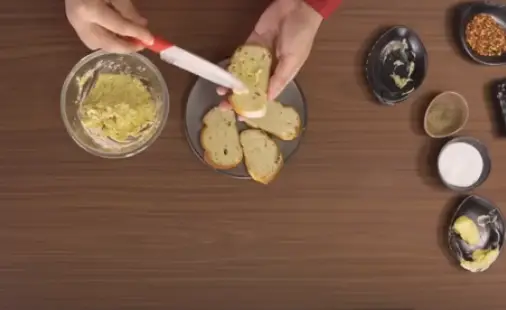
Step 2: . Make sure the bread is evenly covered for a consistent flavor throughout.
Step 3: Arrange the coated bread slices on a baking sheet that has been lined with baking paper. This will prevent the bread from sticking to the sheet.
Step 4: Preheat your oven to 350 degrees Fahrenheit (or 175 degrees Celsius).
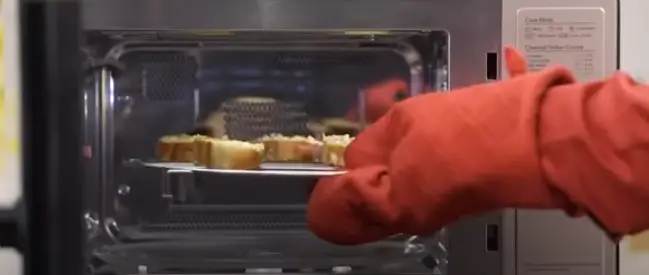
Step 5: Place the baking sheet in the oven and let the bread bake for about 4-5 minutes.
Step 6: After the initial baking time, flip the bread slices to the other side and continue baking for another 4-5 minutes. This ensures both sides get a nice, golden crust.
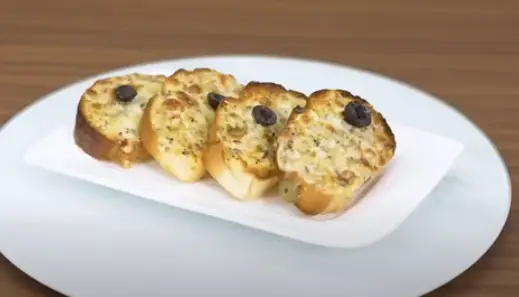
Step 7: Keep an eye on the bread as it bakes. Once it turns a lovely golden brown color, it’s ready to be taken out.
Step 8: Carefully remove the baking sheet from the oven (don’t forget your oven mitts!), let the bread cool for a bit, and then enjoy your homemade garlic bread.
Method 2:
Ingredients:
• Butter100 gms
• Garlic chopped 4-5 cloves
• Parsley fresh or dried to taste
• Bread
• Salt
• Black pepper
• Chili flakes
• Jalapenos
• Olives
• Mozzarella Cheese
Step 1: Begin by taking your butter and adding in the chopped garlic and parsley. Mix these ingredients well until they are fully combined.
Step 2: Proceed to slice your bread diagonally. This will not only enhance presentation but also allow for more surface area for the garlic butter to spread.
Step 3: Spread the garlic butter mixture you prepared earlier evenly onto the diagonally cut bread slices.
Step 4: At this point, you can customize your garlic bread by adding any topping of your choice.
Step 5: If you prefer a simple garlic bread, just stop here and proceed to bake. Your garlic bread already has a flavorful garlic butter spread on it.
Step 6: For cheesy garlic bread lovers, after spreading the garlic butter, layer your slices with a generous amount of cheese.
Step 7: Further customize your cheesy garlic bread with additional toppings like jalapenos, corn, chopped onions, shredded chicken, chili flakes, or any Italian seasoning according to your preference.
Step 8: Preheat your oven to 180 degrees Celsius.
Step 9: Place your prepared garlic bread slices in the oven and bake for about 10 minutes, or until the bread is toasted to your liking and the cheese (if using) is melted and bubbly.
Step 10: Remove from the oven, allow to cool slightly, and serve your homemade garlic bread as a delightful accompaniment to your meal.
Method 3: Chili garlic bread
Ingredients:
- 1/4 cup butter
- 6 cloves garlic, grated
- 2 tbsp coriander, finely chopped
- 1 tsp mixed herbs
- 1 tsp chili flakes
- 1/4 tsp pepper powder
- 1/4 tsp salt
- Bread slices
Step 1: Begin by combining all your ingredients in a bowl. Mix them until they form creamy garlic butter.
Step 2: Take your bread slices. If you prefer bread without crusts or want a more uniform appearance, trim the sides off each slice.
Step 3: Spread your creamy garlic butter uniformly over the slices of bread. Make sure every part of the slice is covered to ensure even flavor throughout.
Step 4: Heat a skillet over medium heat. Once it’s warm, place the bread slices with the garlic butter onto the skillet.
Step 5: Toast the bread in the skillet. Pay attention to the heat and make sure it doesn’t burn.
Step 6: After a few minutes, once the bottom side is golden brown, flip the bread over to toast the other side.
Step 7: Continue toasting until both sides are a beautiful golden brown color, indicating that your garlic bread is ready.
Step 8: Remove the toasted garlic bread from the skillet, let it cool slightly, and then it’s ready to serve. Enjoy your homemade skillet-toasted garlic bread.
Method 4: Air Fryer Garlic Bread
Ingredients:
- 4 slices of bread
- 4 tbsp butter
- 4 cloves garlic, minced
- 1 tsp parsley
Step 1: Take your butter and add minced or crushed garlic to it. Mix them together until they are fully combined.
Step 2: After the garlic and butter are mixed together, add in the parsley. Mix these ingredients until they are uniformly distributed in the butter.
Step 3: Take your bread slices and spread the garlic-parsley butter mixture on each slice. Make sure to cover all areas of the bread slices for an even taste.
Step 4: Preheat your air fryer to 390 degrees Fahrenheit (or approximately 200 degrees Celsius).
Step 5: Once your air fryer has preheated, place the slices of bread with the garlic butter into the basket of the air fryer.
Step 6: Cook the bread in the air fryer for about 3-4 minutes. Check the bread during this time to avoid burning, as air fryer times can vary.
Step 7: After the bread has turned a golden brown color, carefully remove the slices from the air fryer.
Step 8: Allow the garlic bread to cool down for a few minutes before serving. Enjoy your crispy, flavorful air fryer garlic bread.
Method 5: Baked Garlic Bread With Fresh Basil And Chili Flakes
Ingredients:
- 1/4 tsp chili flakes
- 3 heads of garlic
- 100g butter
- 1 tbsp chopped fresh basil
- 1/8 tsp salt
- Baguette
- Olive oil
Step 1: Start by taking a head of garlic and placing it on a cutting board.
Step 2: With a sharp knife, slice off the end of the garlic head, revealing the cloves inside.
Step 3: Place the cut garlic head onto a piece of aluminum foil.
Step 4: Drizzle some olive oil over the top of the garlic head, making sure it seeps into the exposed cloves.
Step 5: Fold the aluminum foil around the garlic head, effectively creating a sealed pouch.
Step 6: Preheat your oven to 200 degrees Celsius, then place the foil-wrapped garlic head in the oven and bake for about an hour.
Step 7: While the garlic is baking, place unsalted butter into a bowl.
Step 8: To the butter, add salt, chili flakes, and fresh basil leaves for additional flavor.
Step 9: Once the garlic has finished roasting, carefully open the foil (watch out for the steam!) and squeeze the softened garlic cloves into the bowl with the butter.
Step 10: Mix all the ingredients in the bowl until they form a consistent spread.
Step 11: Spread the garlic butter evenly on your bread slices, covering all areas for a uniform taste.
Step 12: Preheat your oven to 180 degrees Celsius, place the buttered bread slices on a baking tray, and bake for 15 minutes, or until the bread is toasted to your liking.
Step 13: Remove the garlic bread from the oven, let it cool for a bit, and then serve. Enjoy your homemade garlic bread with a fresh basil and chili twist.
<FAQs
What is the difference between garlic bread and garlic toast?
Garlic bread is typically made from a baguette sliced and spread with garlic butter, then heated until the butter melts. Garlic toast is usually made from pre-sliced bread, spread with garlic butter, and toasted.
Is garlic bread junk food?
While it can be indulgent due to the butter content, homemade garlic bread can be part of a balanced diet when enjoyed in moderation.
How do you keep garlic bread crispy?
Avoid wrapping it in foil if you want it crispy. You can also reheat leftover garlic bread in an oven or toaster to crisp it up.
Why is my garlic bread dry?
Garlic bread can become dry if it’s overcooked or if there’s not enough butter.
Is it safe to eat garlic every day?
Yes, garlic is a healthy addition to your diet due to its antimicrobial and antioxidant properties.
How many cloves are in a head of garlic?
A single head of garlic contains about 10-20 cloves, depending on its size.
Conclusion
With the right ingredients, a bit of practice, and a whole lot of garlic, anyone can bring the aromatic delight of homemade garlic bread to their kitchen. Whether you prefer the straightforward simplicity of the classic garlic-butter-parsley combo or the added depth of roasted garlic with chili and basil, there’s a variation to suit every palate. No matter which method you choose be it the oven, skillet, or air fryer the result is sure to be a crispy, golden, flavorful treat that complements a wide array of dishes.
Key Takeaways
- There are many ways to make garlic bread, from oven-baking to air frying.
- Your choice of ingredients can add variety to your garlic bread, including fresh herbs, cheese, and other toppings.
- Garlic bread can be part of a balanced diet when eaten in moderation.
- Be sure to spread enough butter to keep your garlic bread from becoming dry.
- Garlic has health benefits, so feel good about adding it to your cooking.

Mario Batali is a renowned author, food enthusiast, and passionate chef who has dedicated his life to exploring the world of culinary arts. With a love for sharing his knowledge and experiences, Mario has become a prominent figure in the food blogging community, inspiring countless readers with his creativity and expertise.
In addition to his culinary prowess, Mario Batali is also a talented writer with a flair for engaging storytelling. He launched his own food blog to share his recipes, cooking tips, and personal experiences in the kitchen. Over time, Mario’s blog gained a loyal following of food enthusiasts who appreciate his unique approach to cooking and his dedication to using only the finest ingredients.
Mario Batali’s passion for food and his commitment to sharing his knowledge with others have made him a true inspiration in the world of culinary arts. Through his blog, cookbooks, and public appearances, Mario continues to spread his love of food and the joy of cooking with his ever-growing fanbase.


