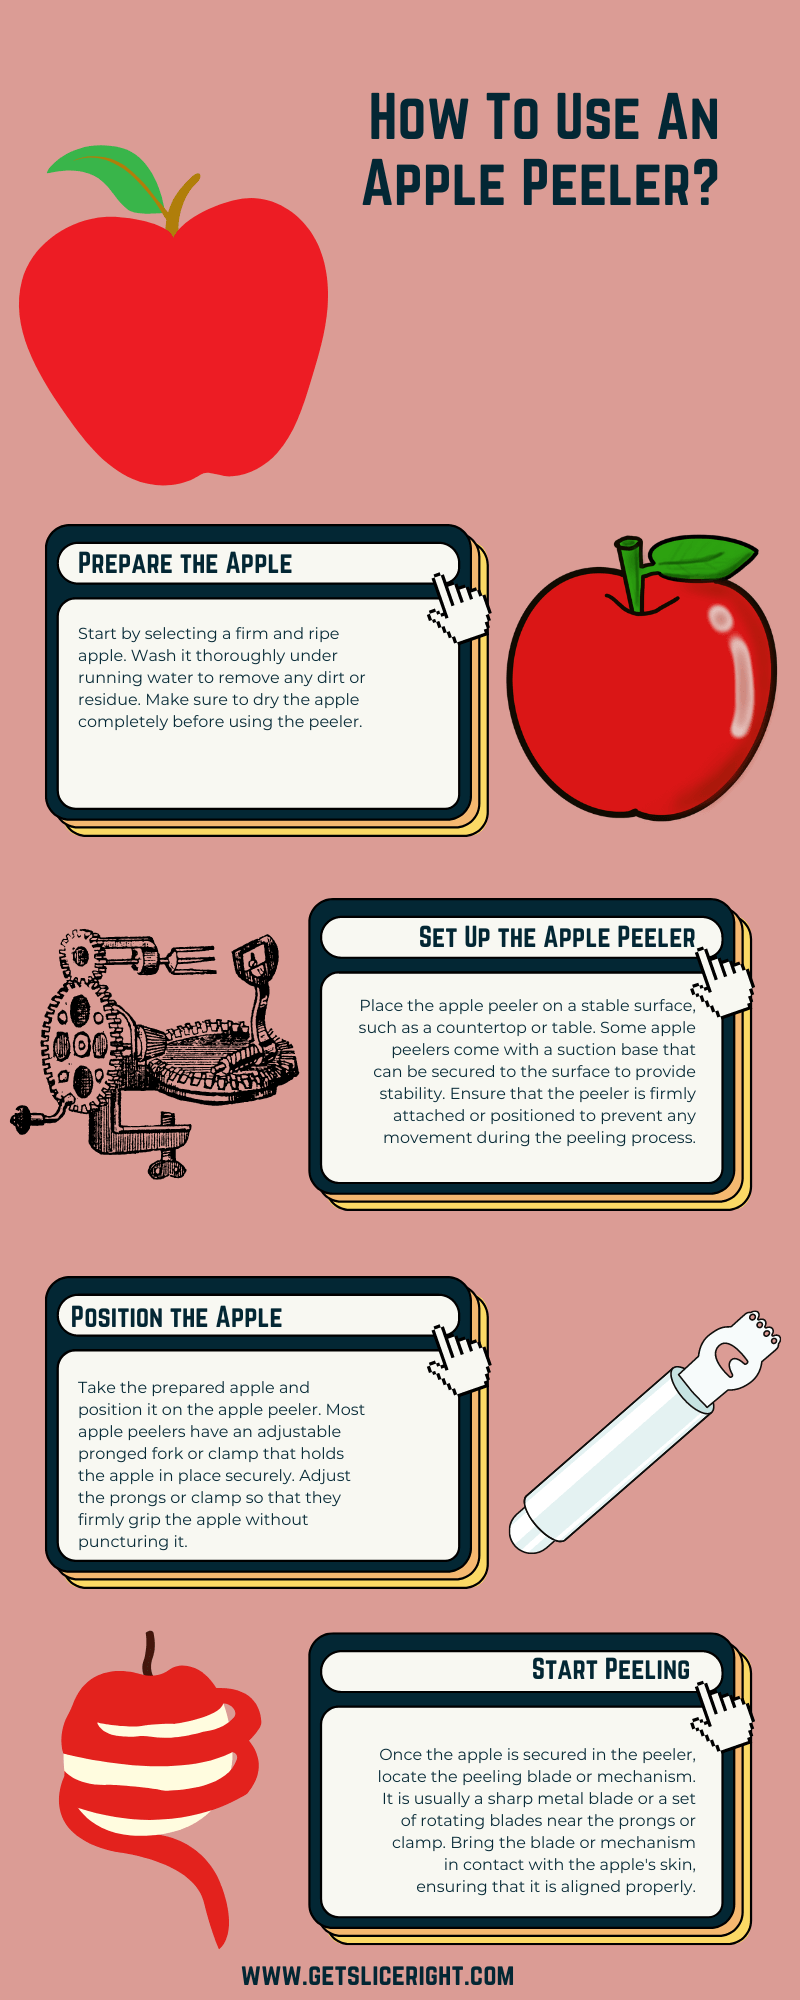
An apple peeler is a fast and efficient way to quickly remove skin from apples. An apple peeler can help you save time in the kitchen, making it easier to prepare recipes that require peeled apples. When using an apple peeler, securing the apple in place before beginning properly is important. This can be done by positioning the arm on top of the stem area and adjusting it to clamp down on the fruit firmly. Once securely in place, the handle should be turned back and forth while rotating the apple simultaneously. This motion will cause the blade to peel away the skin, leaving a perfectly peeled apple in its place.
What Is An Apple Peeler?
An apple peeler is a tool used quickly and easily to peel apples. It consists of a round blade at the end of a handle, with an adjustable arm that clamps down on the apple while rotating it to remove the skin. The process is easy and efficient, making peeling apples much less labor-intensive.
How To Use A Handheld Apple Peeler?
Step 1: Secure the apple peeler onto the countertop or work surface. Ensure the screws are tightened firmly to stay stable during use.
Step 2: Place an apple onto the skewer of the peeler, pushing down gently until it is secure and held in place by two prongs.
Step 3: Use one hand to hold the handle of the peeler, and use your other hand to turn the wheel counterclockwise. This will cause the blade inside to slice through the apple skin as it turns around.
Step 4: Continue turning the wheel until you have completely peeled off all of the skin from your apple.
Step 5: Once the apple is peeled, you may remove it from the skewer by pressing the release lever at the base of the peeler.
Step 6: Clean your peeler with a damp cloth and dry it completely before you store it away.
How To Use A Countertop-Mounted Apple Peeler?
Step 1: Before using your countertop-mounted apple peeler, make sure to read and understand all instructions provided with it.
Step 2: Start by washing the apples you will use to peel thoroughly under running water. Dry them up with a clean cloth or kitchen paper.
Step 3: Place your apple peeler over a flat surface, preferably on the kitchen counter.
Step 4: Secure your apple peeler firmly by tightening its screws and bolts if provided.
Step 5: Place one washed apple at a time onto the coring rod of the apple peeler. Put some force while pushing it down to insert the blade into the apple’s core.
Step 6: Apply pressure on the base of your apple peeler by pushing it down firmly; hold it in place so that the blade makes a full rotation around the apple and peels off its skin.
Step 7: Once you finish one apple, remove it from the machine and replace it with another.
Step 8: When peeling all the apples, remove the skinned-off pieces and dispose of them.
Step 9: Clean your apple peeler thoroughly before storing it away. Dry it up so that no moisture is left on its surface.
How To Use An Electric Apple Peeler?
Step 1: Gather your supplies: an electric apple peeler, a sturdy table or countertop, and at least one apple of any variety.
Step 2: Pug the apple peeler onto the stable surface into an outlet. Make sure it is firmly fixed in place before proceeding!
Step 3: Place an apple on the apple peeler’s spikes and ensure it is stable.
Step 4: Turn on the power switch to activate the blades, which will spin and start peeling away your apple’s skin.
Step 5: You can adjust how thick or thin you would like your slices by turning the dial at the top of the peeler.
Step 6: As the blades rotate, you will see your apple peel come away from it. Remove any excess bits of peel that may remain before repeating this process with additional apples.
Step 7: Once all your apples have been peeled, switch off the power and unplug your electric apple peeler. Carefully remove it from the surface and clean away any apple residue.
Benefits Of Using Apple Peeler
- Apple peelers are an easy and efficient way to peel quickly, core, and slice apples for pies, sauces, snacks, and other desserts.
- Peelers can help you save time in the kitchen while always achieving perfect results.
- With commercial machines, you’ll get precise and beautiful results every time with much less effort and mess than with a traditional peeler.
- Peelers help you avoid eating too much of the apple’s skin, which can contain more pesticides and chemicals than the fleshy part of an apple.
- Apple peelers are also great for creating uniform slices that look attractive and taste great.
- Peelers can help you quickly and uniformly core an apple to make a hollow center for stuffing with other ingredients, such as cream cheese or cinnamon applesauce. This is a great way to make fun and delicious desserts that your whole family will love.
- Peelers are small and compact, so they can easily be stored away when not in use. This makes them a great option for those who need the convenience of having an apple peeler on hand without taking up too much counter space or storage space.
What To Look For In An Apple Peeler?
- Ensure it has a suction pad that sticks to any flat surface and is easy to attach and detach.
- Look for one with an adjustable blade, so you can adjust how much skin you want to be removed from your apples.
- Choose one with a sharp knife to ensure the peeler will cut through the apple’s skin without damaging the flesh.
- Ensure the handle is comfortable to use, as you will turn it many times during the peeling process.
- If possible, look for a model with multiple blades so you can peel and core simultaneously.
- Look for a non-slip grip that won’t slip out of your hands during use.
- Make sure the model is easy to clean and store away after use.
- Look for a peeler that has an ergonomic design, so you can grip it comfortably while peeling or coring apples.
- Select one made from high-quality materials so it will last for many years.
Tips
Here are some tips to help you achieve perfect apple peeling:
- Choose the right peeler: Select one that is comfortable for you to hold and easy to maneuver. A sharp blade is essential for efficient peeling.
- Maintain consistent pressure: Apply even pressure while peeling to remove the skin uniformly without gouging the apple flesh.
- Peel in a continuous motion: Avoid stopping and starting too often, as this can cause the apple skin to tear.
- Rotate the apple: Turn the apple as you peel to maintain a consistent angle and ensure even peeling.
- Practice: Like any skill, practice makes perfect. The more you use an apple peeler, the better you’ll become at peeling apples efficiently and neatly.
FAQs
How do I clean an apple peeler?
Most apple peelers can be cleaned with warm, soapy water. Rinse the peeler thoroughly and dry it completely before storing it.
Can I use an apple peeler for other fruits and vegetables?
Many apple peelers, such as pears, potatoes, and cucumbers, can also be used for fruits and vegetables. Consult the peeler’s user manual for any specific guidelines or limitations.
How do I sharpen the blade on my apple peeler?
Some apple peelers have replaceable blades, while others may require professional sharpening. Check the manufacturer’s instructions for the sharpness of your peeler’s blade.
Can I use an apple peeler to core and slice apples as well?
Some countertop apple peelers include coring and slicing features, allowing you to peel, core, and slice apples in one motion. Handheld peelers typically do not have these additional functions.
How do I prevent apple slices from browning after peeling?
Place apple slices in a bowl of cold water mixed with a little lemon juice or vinegar to prevent apple slices from browning after peeling. This acidic solution will help slow down the oxidation process that causes browning.
Conclusion
Using an apple peeler can make peeling apples much easier and more efficient. Whether you choose a handheld or countertop peeler, following the right technique and practicing will help you achieve perfect apple peeling every time.

Mario Batali is a renowned author, food enthusiast, and passionate chef who has dedicated his life to exploring the world of culinary arts. With a love for sharing his knowledge and experiences, Mario has become a prominent figure in the food blogging community, inspiring countless readers with his creativity and expertise.
In addition to his culinary prowess, Mario Batali is also a talented writer with a flair for engaging storytelling. He launched his own food blog to share his recipes, cooking tips, and personal experiences in the kitchen. Over time, Mario’s blog gained a loyal following of food enthusiasts who appreciate his unique approach to cooking and his dedication to using only the finest ingredients.
Mario Batali’s passion for food and his commitment to sharing his knowledge with others have made him a true inspiration in the world of culinary arts. Through his blog, cookbooks, and public appearances, Mario continues to spread his love of food and the joy of cooking with his ever-growing fanbase.